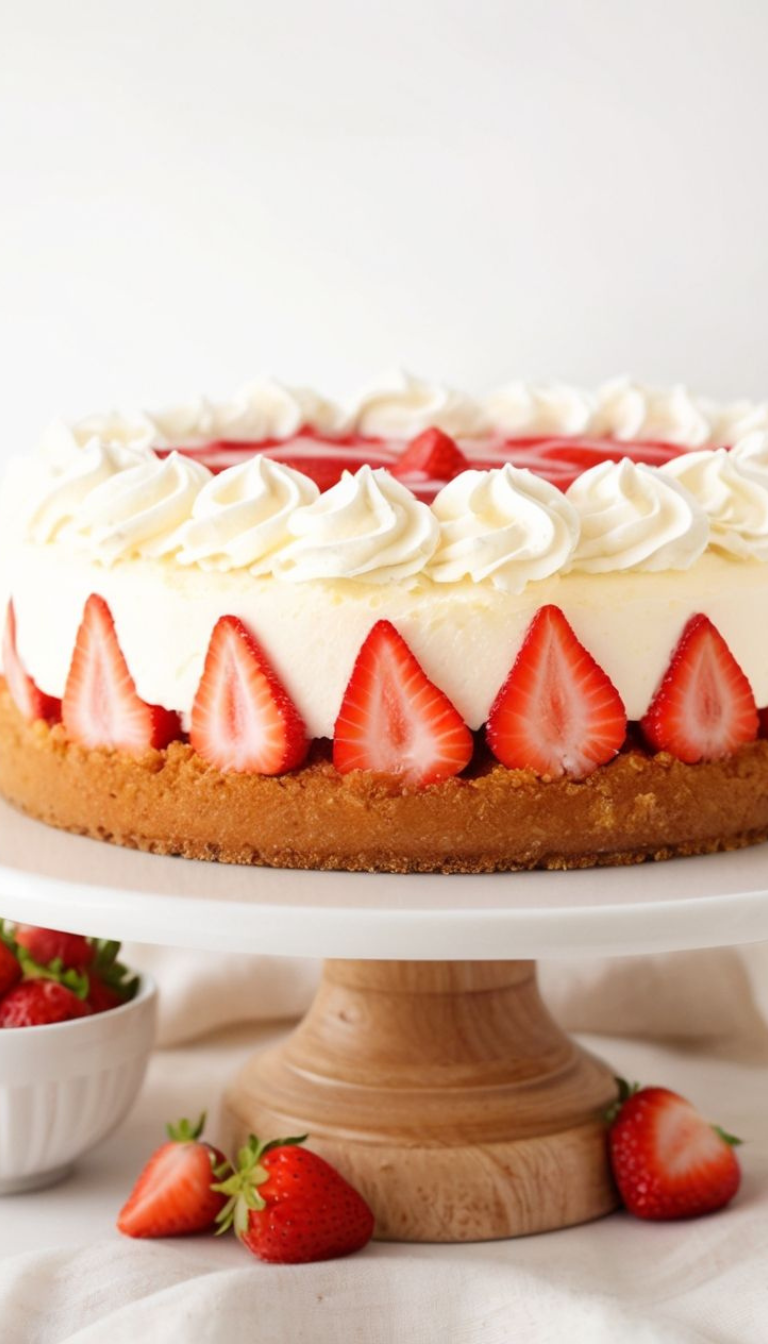
Looking for a simple, no-bake dessert that’s light, creamy, and bursting with citrusy flavor? My Easy Lemon Bars with Graham Cracker Crust are exactly what you need!

These bars combine a buttery graham cracker base with a silky lemon cheesecake filling that’s both tangy and sweet.
They’re perfect for spring and summer gatherings, holiday desserts, or just a midweek treat. No oven required—and I promise, everyone will ask for the recipe.
Whether you’re a beginner or a seasoned home baker, this lemon bar recipe is foolproof and incredibly satisfying.
The graham cracker crust gives you that nostalgic, crunchy texture, while the whipped lemon cheesecake layer is cool, airy, and oh-so-refreshing.
Ingredients List
For the Graham Cracker Crust
- 1 ½ cups graham cracker crumbs
- 2 tablespoons packed light brown sugar
- 6 tablespoons salted butter, melted
For the Lemon Cheesecake Filling
- 2 (8-ounce) bricks cream cheese, softened to room temperature
- ½ cup granulated sugar
- ¼ cup plain whole milk Greek yogurt, at room temperature
- ½ teaspoon vanilla extract
- Freshly grated zest from 1 lemon
- 1 teaspoon freshly squeezed lemon juice
- 1 cup heavy whipping cream
Optional Toppings
- Cool Whip or homemade whipped cream
- Lemon slices and/or fresh berries
Required Kitchen Tools

To make this easy lemon bar recipe seamless and stress-free, here are the tools I always recommend having on hand:
- 8 or 9-inch square baking dish – Either size works well for this recipe. Just be sure it’s lined with parchment for easy slicing.
- Mixing bowls – One small for the crust and one large for the filling.
- Electric hand mixer or stand mixer – This is key to getting your filling creamy and smooth.
- Spatula – To scrape down the sides and spread the filling evenly.
- Offset spatula (optional) – Makes smoothing the top of your bars super easy.
- Zester or fine grater – To get the freshest, brightest lemon flavor.
- Measuring cups and spoons – Precision is everything when baking!
With these tools and ingredients, you’re well on your way to making the dreamiest lemon bars with zero baking required.
Graham Cracker Crust Preparation
A solid crust is the foundation of every great bar dessert, and this one is as easy as it gets. I love using graham cracker crumbs for their toasty, sweet flavor and perfect crunch. If you’re using whole crackers, just crush them in a food processor or seal them in a zip-top bag and smash them with a rolling pin until fine.
How to Make the Crust
- In a small bowl, mix together the graham cracker crumbs and light brown sugar until evenly combined.
- Pour in the melted salted butter and stir until all the crumbs are moistened. It should look like wet sand—this helps the crust stick together.
- Line your 8-inch or 9-inch square baking dish with two overlapping pieces of parchment paper, letting the sides hang over. This will make it easy to lift the bars out later.
- Press the crumb mixture firmly and evenly into the bottom of the pan. I use the flat bottom of a measuring cup to compact it—it really helps hold everything together.
- Pop the crust into the refrigerator to chill while you prepare the filling. Chilling helps it set and gives you a nice firm base once the bars are sliced.

Lemon Cheesecake Filling
The star of the show is this creamy lemon cheesecake filling that’s light and airy, yet rich enough to satisfy every dessert craving. The combination of lemon zest, juice, and tangy Greek yogurt gives it just the right zing, balanced beautifully by the richness of cream cheese and whipped cream.
How to Make the Filling
- In a large mixing bowl, use your electric hand mixer or stand mixer to beat the softened cream cheese and granulated sugar until smooth and fluffy. Scrape down the sides of the bowl as needed.
- Mix in the Greek yogurt, vanilla extract, lemon zest, and lemon juice just until everything is combined. Don’t overbeat at this stage—you just want it smooth and uniform.
- Slowly add the heavy whipping cream about ¼ cup at a time. Whip it into the cream cheese mixture thoroughly after each addition—this is what gives your filling that gorgeous, airy texture. Be patient; each addition should take about 30 seconds or more of mixing.
- Once all the cream is incorporated and the mixture is light and fluffy, pour the filling over your chilled crust.
- Use a spatula or offset spatula to spread the filling evenly into the pan. Smooth the top for that picture-perfect finish.
- Cover and chill in the refrigerator for at least 8 hours—or even better, overnight. This gives the bars time to set fully and makes them easier to slice.
Slicing and Serving Your Lemon Bars
Once your lemon bars have chilled and fully set, it’s time for the fun part—slicing and serving! This part can make or break the presentation, so here are a few tips to get clean, bakery-style squares every time.
How to Slice Lemon Bars Cleanly
- Lift and Transfer
Use the overhanging parchment paper to gently lift the entire block of chilled bars out of the pan. Transfer it to a cutting board for easy slicing. - Use a Sharp Knife
Grab a long, sharp knife—preferably one with a thin blade. This helps slice cleanly through the creamy filling and firm crust. - Wipe Between Cuts
Wipe the knife clean with a damp cloth or paper towel between each cut. It might seem tedious, but it keeps your edges smooth and crumb-free. - Choose Your Size
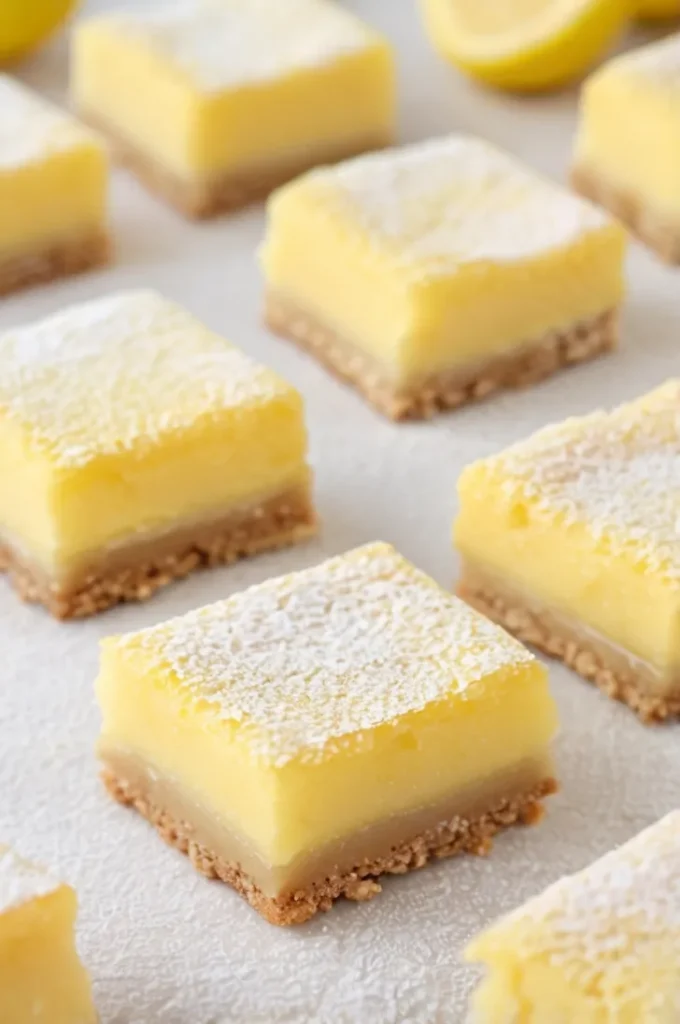
This recipe makes 9 large squares or 16 smaller bars—depending on how rich you want each serving to be. Trust me, they’re decadent enough that the smaller size is often just right.
Optional Toppings and Decorations
Want to take your lemon bars to the next level? These topping ideas add extra flavor, texture, and visual appeal:
- Cool Whip or Homemade Whipped Cream
A fluffy dollop adds a creamy contrast to the lemony filling. - Fresh Berries
Blueberries, raspberries, or sliced strawberries bring a pop of color and juicy sweetness that pairs beautifully with lemon. - Lemon Slices or Curls
Thin lemon slices or twisted zest curls are elegant and fresh-looking—perfect for entertaining. - Dusting of Powdered Sugar (if desired)
Not required, but a classic touch for that extra bit of charm (just add it right before serving to avoid it melting into the bars).
Whether you keep things minimal or go all out with toppings, these lemon bars are a guaranteed crowd-pleaser.
Storage Instructions

These lemon bars store wonderfully, which makes them a perfect make-ahead dessert for parties, brunches, or just satisfying your sweet cravings throughout the week.
How to Store Lemon Bars
- Refrigerator:
Keep the bars in an airtight container in the fridge for up to 4–5 days. I like to place parchment paper between layers if I’m stacking them to keep the tops smooth and prevent sticking. - Room Temperature (Short-Term):
If you’re serving them at a gathering, they can sit out at room temperature for about 2 hours, but they’re best enjoyed chilled.
How to Freeze Lemon Bars
These bars are also freezer-friendly!
- Cut the bars into individual squares and place them on a baking sheet lined with parchment.
- Freeze until solid (about 1–2 hours), then transfer the bars to a freezer-safe container or zip-top bag. Layer parchment between bars if needed.
- Store in the freezer for up to 1 month.
- To serve, simply thaw in the refrigerator overnight or let sit at room temperature for 30–60 minutes.
They’re just as delicious after freezing—and it’s always a good idea to have a stash ready for unexpected guests (or cravings!).

Easy Lemon Bars with Graham Cracker Crust
Equipment
- 8 or 9-inch square baking dish
- Mixing Bowls
- Electric hand mixer or stand mixer
- Spatula
- Offset spatula (optional)
- Zester or fine grater
- Measuring Cups and Spoons
Ingredients
For the Graham Cracker Crust
- 1 ½ cups graham cracker crumbs
- 2 tablespoons packed light brown sugar
- 6 tablespoons salted butter, melted
For the Lemon Cheesecake Filling
- 2 (8-ounce) bricks cream cheese, softened to room temperature
- ½ cup granulated sugar
- ¼ cup plain whole milk Greek yogurt, at room temperature
- ½ teaspoon vanilla extract
- Freshly grated zest from 1 lemon
- 1 teaspoon freshly squeezed lemon juice
- 1 cup heavy whipping cream
Optional Toppings
- Cool Whip or homemade whipped cream
- Lemon slices and/or fresh berries
Instructions
How to Make the Crust
- In a small bowl, mix together the graham cracker crumbs and light brown sugar until evenly combined.
- Pour in the melted salted butter and stir until all the crumbs are moistened. It should look like wet sand—this helps the crust stick together.
- Line your 8-inch or 9-inch square baking dish with two overlapping pieces of parchment paper, letting the sides hang over. This will make it easy to lift the bars out later.
- Press the crumb mixture firmly and evenly into the bottom of the pan. I use the flat bottom of a measuring cup to compact it—it really helps hold everything together.
- Pop the crust into the refrigerator to chill while you prepare the filling. Chilling helps it set and gives you a nice firm base once the bars are sliced.
Lemon Cheesecake Filling
- In a large mixing bowl, use your electric hand mixer or stand mixer to beat the softened cream cheese and granulated sugar until smooth and fluffy. Scrape down the sides of the bowl as needed.
- Mix in the Greek yogurt, vanilla extract, lemon zest, and lemon juice just until everything is combined. Don’t overbeat at this stage—you just want it smooth and uniform.
- Slowly add the heavy whipping cream about ¼ cup at a time. Whip it into the cream cheese mixture thoroughly after each addition—this is what gives your filling that gorgeous, airy texture. Be patient; each addition should take about 30 seconds or more of mixing.
- Once all the cream is incorporated and the mixture is light and fluffy, pour the filling over your chilled crust.
- Use a spatula or offset spatula to spread the filling evenly into the pan. Smooth the top for that picture-perfect finish.
- Cover and chill in the refrigerator for at least 8 hours—or even better, overnight. This gives the bars time to set fully and makes them easier to slice.
Conclusion
These Easy Lemon Bars with Graham Cracker Crust are the kind of dessert that never goes out of style. They’re no-bake, creamy, zesty, and totally irresistible—what more could you ask for? Whether you serve them at a potluck, baby shower, or just as a refreshing finish to a weeknight dinner, they’re guaranteed to be a hit.
With just a few simple ingredients and a little chill time, you can create a dessert that looks elegant, tastes amazing, and requires zero baking. If you’re a fan of lemony desserts or cheesecake-style treats, this recipe will become a favorite in no time.