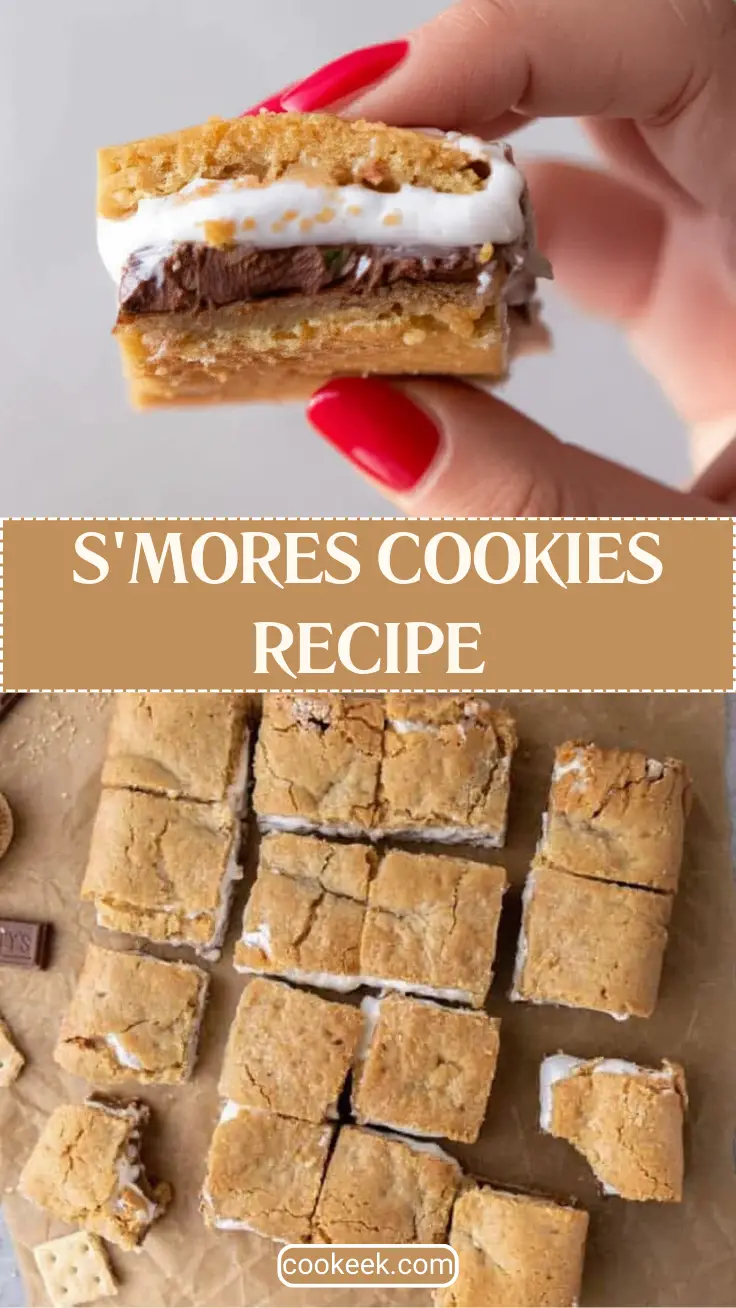
Craving the nostalgic taste of gooey marshmallows, melted chocolate, and crunchy graham crackers—but without the campfire? These S’mores Cookie Bars bring all the cozy flavors of your favorite campfire treat right into your kitchen.
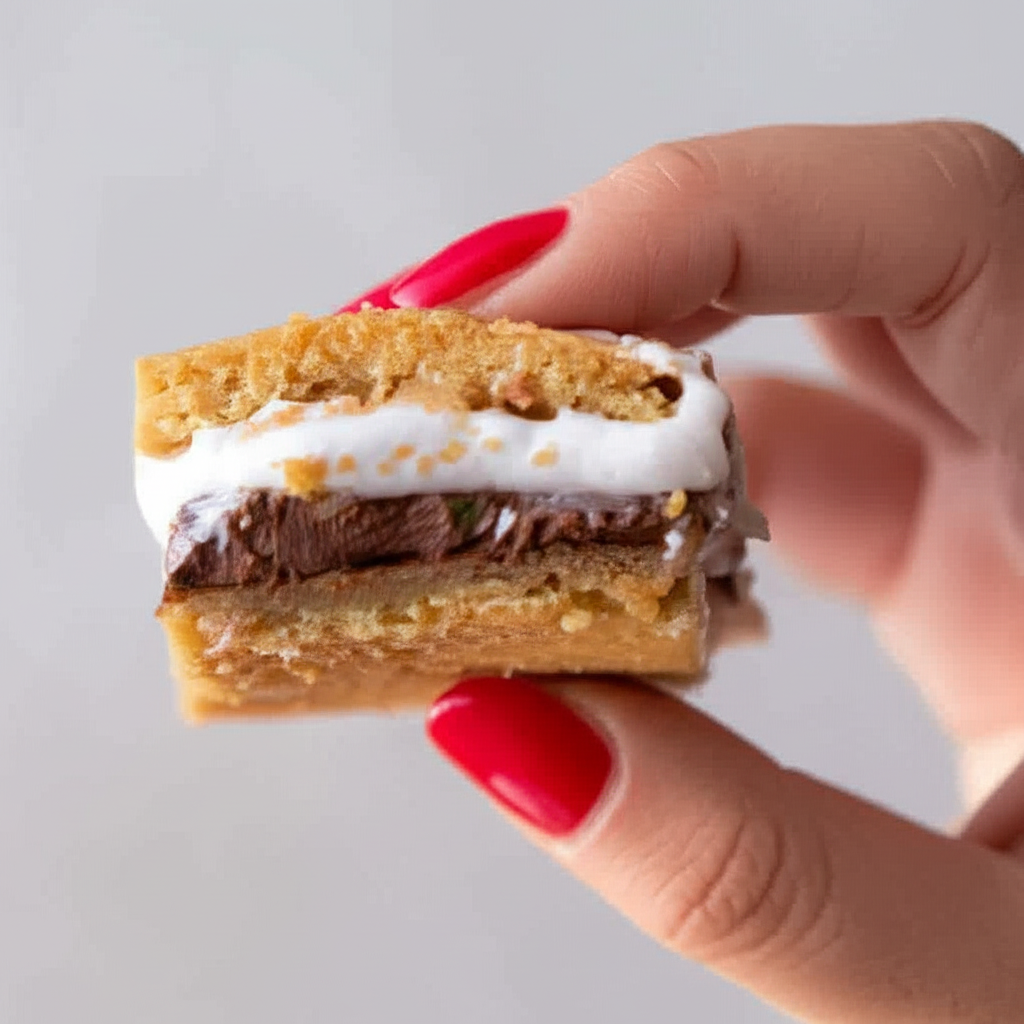
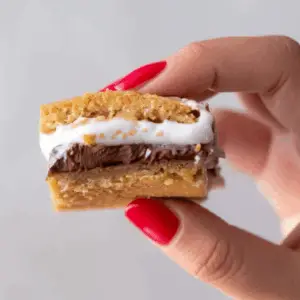
Perfectly chewy with a golden cookie crust, melted Hershey’s chocolate, and creamy marshmallow fluff in every bite, this dessert is everything you love about s’mores baked into an easy, sharable bar.
Whether you’re looking for a quick bake for your next party or just want to treat yourself with something sweet and indulgent, this easy S’mores cookie bar recipe is a guaranteed crowd-pleaser.
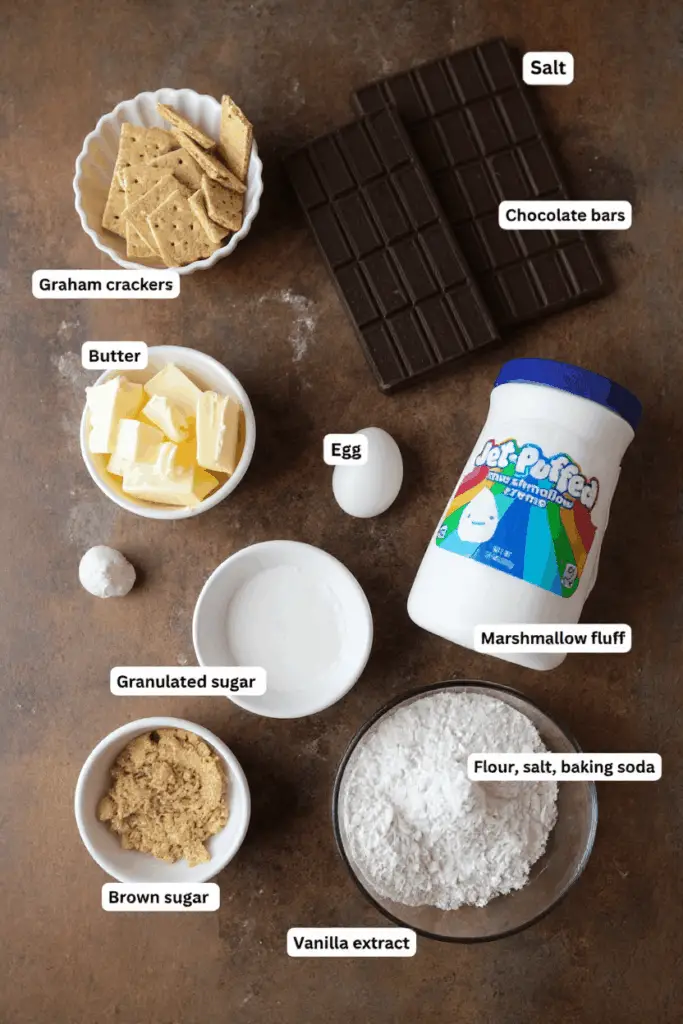
Ingredients List
For the Cookie Dough:
- ½ cup butter, softened (salted or unsalted)
- ⅓ cup brown sugar, packed
- ¼ cup granulated sugar
- 1 large egg
- 1 teaspoon vanilla extract
- 1½ cups all-purpose flour
- ½ cup graham crackers, finely crushed (about 3.5 sheets)
- ¼ teaspoon salt
- ¾ teaspoon baking soda
For the Filling:
- 5 standard Hershey bars (milk chocolate), whole or broken into pieces
- 1½ cups marshmallow fluff (or marshmallow creme)
Required Kitchen Tools
Before we dive into mixing and layering, make sure your kitchen is equipped with the following tools. These simple items will help make your homemade s’mores cookies come together seamlessly:
- Mixing Bowl & Hand Mixer – To cream together your butter and sugars and mix the cookie dough base smoothly.
- Measuring Cups & Spoons – For accurate measurements, especially with dry ingredients and marshmallow fluff.
- 8×8 Inch Baking Pan – The perfect size for thick, chewy cookie bars with gooey layers.
- Parchment Paper – Prevents sticking and allows for easier removal and slicing of the bars.
- Rubber Spatula – Helpful when spreading marshmallow fluff evenly over the chocolate.
- Freezer Space – Optional, but chilling the bottom dough layer helps make assembly easier.
Dough Preparation
Creating the perfect base for these S’mores cookie bars is all about achieving the right balance of chewy, buttery cookie dough with just the right hint of graham cracker flavor.
Mixing the Ingredients
Start by preheating your oven to 350°F (175°C) and lining an 8×8 inch square pan with parchment paper.
In a large bowl, cream the softened butter with brown sugar and granulated sugar until the mixture is light and fluffy. This gives your cookie base that rich caramelized flavor. Next, add in the egg and vanilla extract, beating until well combined.
Then, fold in the dry ingredients: flour, finely crushed graham crackers, baking soda, and salt. Mix just until the dough comes together and you can no longer see streaks of flour. Be careful not to overmix—this ensures the bars stay soft and chewy.
Shaping & Layering the S’mores Cookie Bars
This is where the magic happens. We’ll be layering the cookie dough, chocolate bars, and marshmallow fluff to create that signature s’mores effect—with gooey goodness in every single bite.
Preparing the Layers
After your dough is ready, divide it into two equal portions. Press the first half evenly into the parchment-lined 8×8 baking pan. This will form the sturdy base for your bars.
Now, carefully lift the parchment paper with the pressed dough out of the pan and place it in the freezer. This firms it up so you can later place it on top without breaking it.
While that bottom layer chills, re-line the same pan with a fresh sheet of parchment paper, and press the remaining cookie dough into the pan. This will now become your top layer once we assemble everything.
Adding the Chocolate & Marshmallow
Once your top dough layer is pressed into the pan, it’s time to lay down the chocolate bars. Place the Hershey bars directly over the dough—feel free to break them apart if needed to cover the surface evenly.
Next comes the best part: spoon the marshmallow fluff right over the chocolate layer. Use a rubber spatula or spoon to gently spread it across the chocolate. It doesn’t have to be perfect—once it bakes, it will melt beautifully.
Finishing the Layers
Now, go back to your freezer and carefully remove the chilled bottom dough layer from the parchment. Flip it on top of the marshmallow layer, lining it up as best as you can. If it breaks slightly, no worries—just patch it together by pressing gently.
At this stage, your cookie bar is fully assembled and ready to be baked to golden perfection.
Baking & Cooling the S’mores Cookie Bars
Once your cookie bar layers are assembled, it’s time to let the oven work its magic. The dough will bake into a golden, buttery crust, while the chocolate and marshmallow layers melt into a warm, gooey center.
Bake to Golden Perfection
Preheat your oven to 350°F (175°C) if you haven’t already.
Place the assembled pan in the center rack and bake for about 25 minutes. The top should be a light golden brown, and you may see some marshmallow fluff peeking through the edges—that’s a good sign!
Avoid overbaking, as you want the bars to remain soft and gooey in the center. Once done, remove the pan from the oven and set it on a cooling rack.
Let It Cool Before Slicing
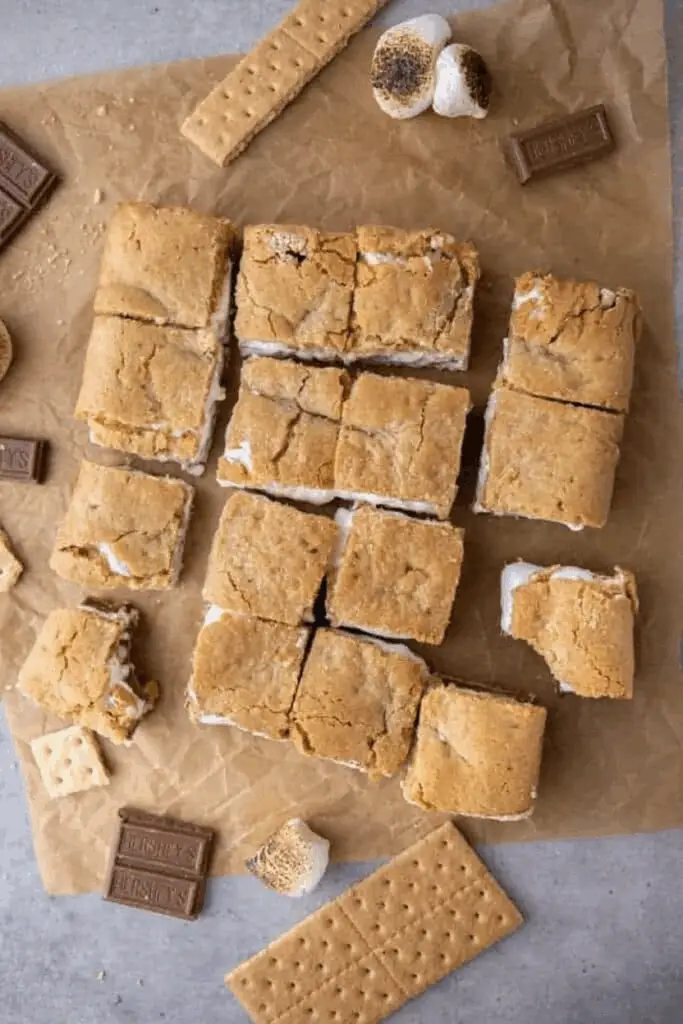
This part requires a little patience (I know—it’s tough). Let the bars cool completely in the pan before slicing. If you cut them too soon, the layers may slide or collapse, and you’ll miss out on that clean, picture-perfect cross-section.
Once cooled, use the parchment paper to lift the entire slab out of the pan, and place it on a cutting board. Use a sharp knife to slice into squares or rectangles—whatever shape your cookie-loving heart desires.
Serving & Storage Tips
How to Serve S’mores Cookie Bars
These S’mores Cookie Bars are best enjoyed slightly warm or at room temperature. If you want that gooey, fresh-out-of-the-oven effect, pop a slice in the microwave for 10–15 seconds to melt the chocolate and marshmallow again.
They pair perfectly with:
- A cold glass of milk
- A scoop of vanilla or toasted marshmallow ice cream
- A drizzle of melted chocolate or caramel sauce for an extra-indulgent twist
Whether you’re serving them at a potluck, packing them in a lunchbox, or saving them for a weekend movie night, these bars are guaranteed to impress.
How to Store Your S’mores Bars
To keep your S’mores Cookie Bars fresh and chewy:
- Store in an airtight container at room temperature for up to 4 days.
- For longer storage, you can refrigerate them for up to 1 week, just let them sit at room temp for a few minutes before eating to soften.
- These bars also freeze well for up to 2 months. Wrap them individually in plastic wrap and store in a zip-top freezer bag. Thaw at room temperature or microwave briefly to warm.
S’mores Cookies Recipe
Equipment
- Mixing Bowl & Hand Mixer
- Measuring Cups & Spoons
- 8×8 Inch Baking Pan
- Parchment Paper
- Rubber Spatula
- Freezer Space
Ingredients
For the Cookie Dough:
- ½ cup butter, softened (salted or unsalted)
- ⅓ cup brown sugar, packed
- ¼ cup granulated sugar
- 1 large egg
- 1 teaspoon vanilla extract
- 1½ cups all-purpose flour
- ½ cup graham crackers, finely crushed (about 3.5 sheets)
- ¼ teaspoon salt
- ¾ teaspoon baking soda
For the Filling:
- 5 standard Hershey bars (milk chocolate), whole or broken into pieces
- 1½ cups marshmallow fluff (or marshmallow creme)
Instructions
Dough Preparation
- Start by preheating your oven to 350°F (175°C) and lining an 8×8 inch square pan with parchment paper.In a large bowl, cream the softened butter with brown sugar and granulated sugar until the mixture is light and fluffy. This gives your cookie base that rich caramelized flavor. Next, add in the egg and vanilla extract, beating until well combined.Then, fold in the dry ingredients: flour, finely crushed graham crackers, baking soda, and salt. Mix just until the dough comes together and you can no longer see streaks of flour. Be careful not to overmix—this ensures the bars stay soft and chewy.
- After your dough is ready, divide it into two equal portions. Press the first half evenly into the parchment-lined 8×8 baking pan. This will form the sturdy base for your bars.Now, carefully lift the parchment paper with the pressed dough out of the pan and place it in the freezer. This firms it up so you can later place it on top without breaking it.While that bottom layer chills, re-line the same pan with a fresh sheet of parchment paper, and press the remaining cookie dough into the pan. This will now become your top layer once we assemble everything.
- Once your top dough layer is pressed into the pan, it’s time to lay down the chocolate bars. Place the Hershey bars directly over the dough—feel free to break them apart if needed to cover the surface evenly.Next comes the best part: spoon the marshmallow fluff right over the chocolate layer. Use a rubber spatula or spoon to gently spread it across the chocolate. It doesn’t have to be perfect—once it bakes, it will melt beautifully.
- Now, go back to your freezer and carefully remove the chilled bottom dough layer from the parchment. Flip it on top of the marshmallow layer, lining it up as best as you can. If it breaks slightly, no worries—just patch it together by pressing gently.
- Preheat your oven to 350°F (175°C) if you haven’t already.Place the assembled pan in the center rack and bake for about 25 minutes. The top should be a light golden brown, and you may see some marshmallow fluff peeking through the edges—that’s a good sign!Avoid overbaking, as you want the bars to remain soft and gooey in the center. Once done, remove the pan from the oven and set it on a cooling rack.
- This part requires a little patience (I know—it’s tough). Let the bars cool completely in the pan before slicing. If you cut them too soon, the layers may slide or collapse, and you'll miss out on that clean, picture-perfect cross-section.Once cooled, use the parchment paper to lift the entire slab out of the pan, and place it on a cutting board. Use a sharp knife to slice into squares or rectangles—whatever shape your cookie-loving heart desires.
Conclusion
There’s something truly comforting about the classic combination of graham crackers, chocolate, and marshmallows—and this easy S’mores Cookie Bar recipe transforms those flavors into a rich, chewy, oven-baked treat. From the golden cookie crust to the melted chocolate and fluffy marshmallow center, every bite feels like a warm campfire hug.
The best part? You don’t need a firepit or skewers—just a mixing bowl, a baking pan, and a sweet tooth. Whether you’re baking for a crowd or indulging solo, these cookie bars are a fun and nostalgic twist on a timeless favorite.
So go ahead—gather your ingredients, preheat the oven, and bring the s’mores magic into your kitchen today. And don’t forget to share the love (and maybe the recipe) with friends and family!