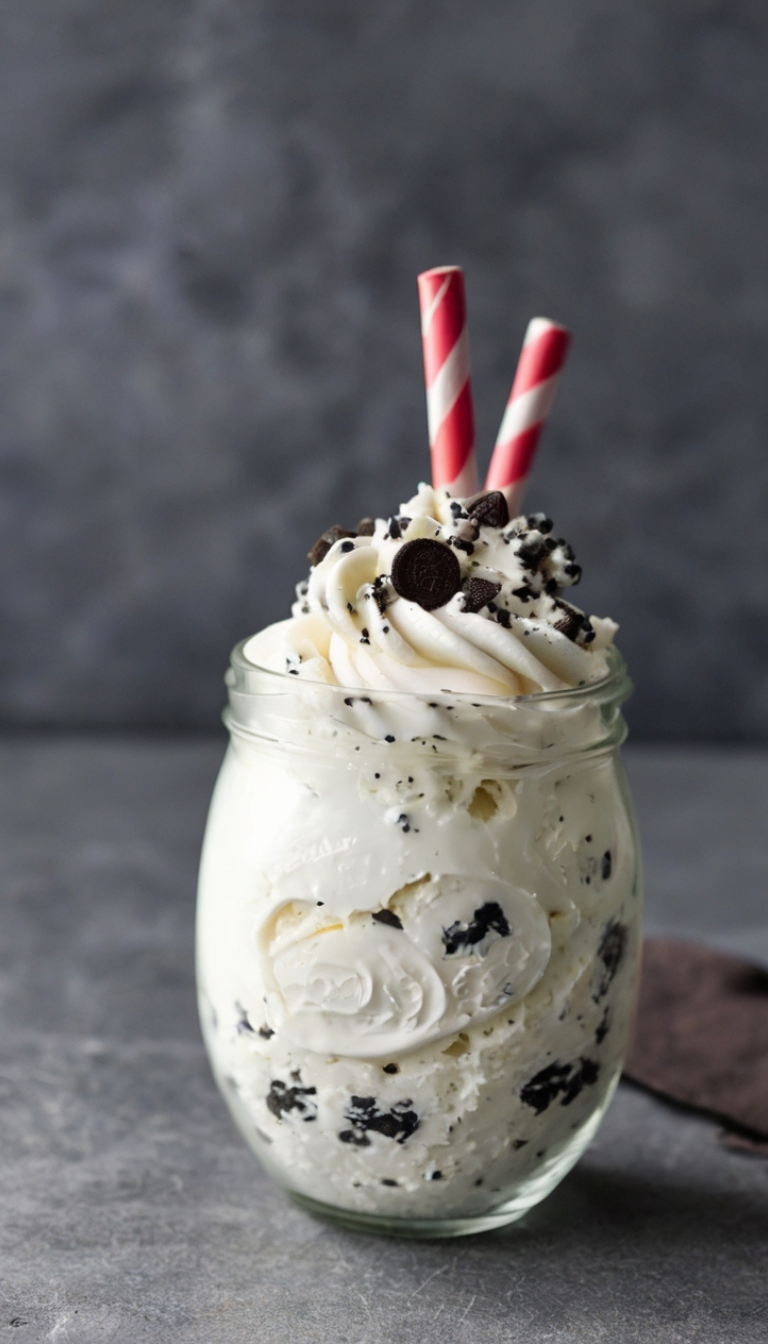
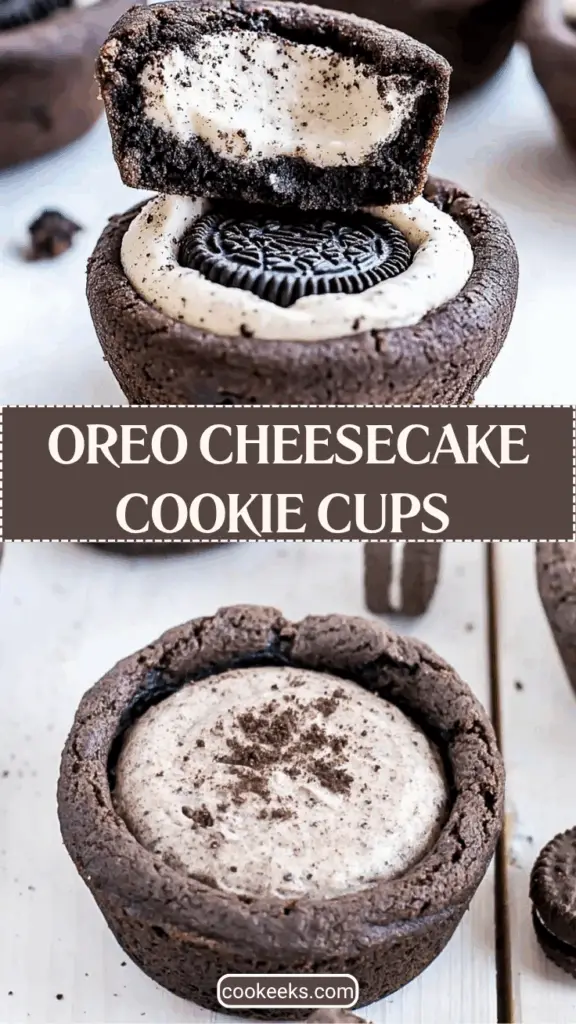
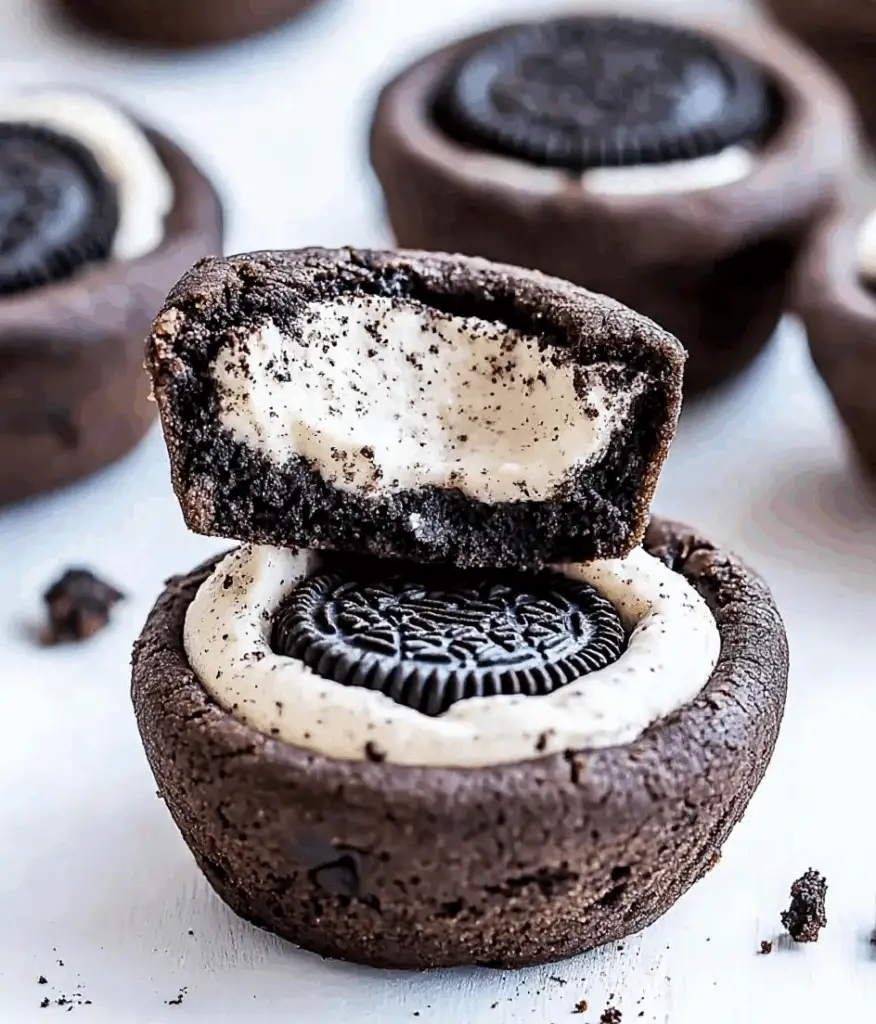
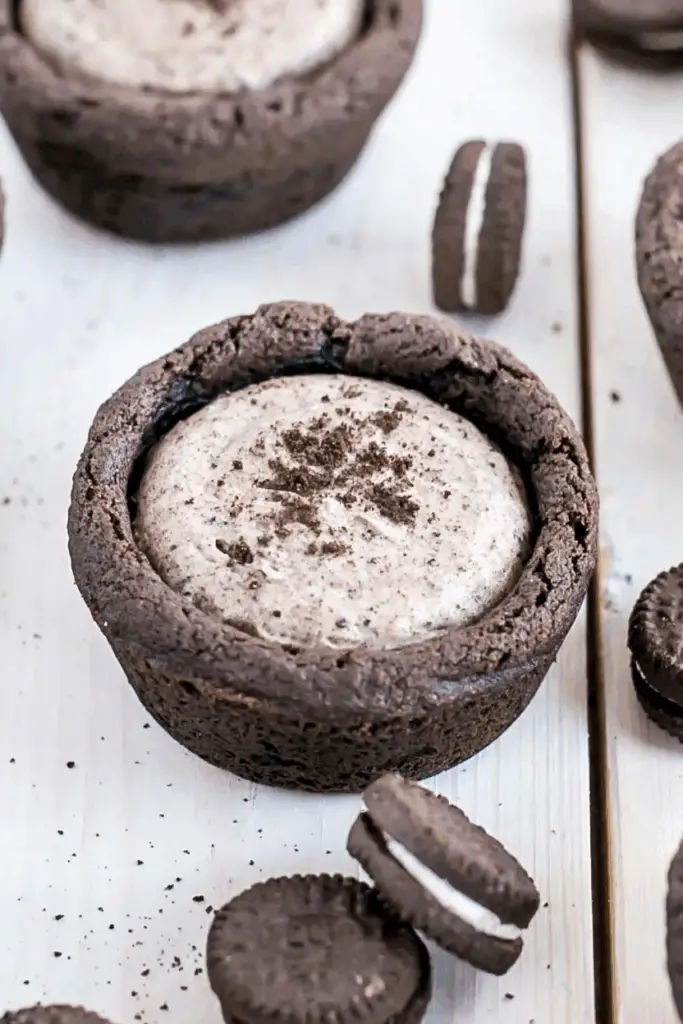
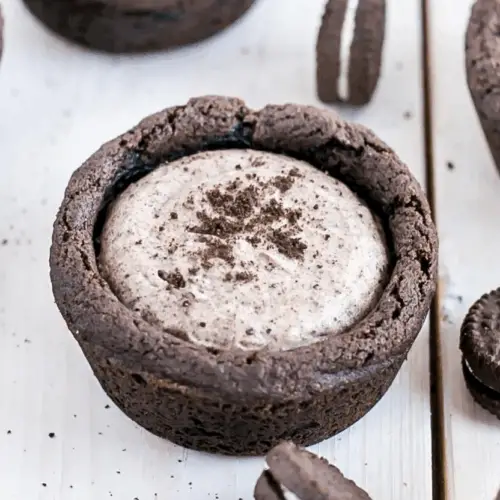
If you love the irresistible combo of Oreo cookies and creamy cheesecake, you’re in for a real treat! These Oreo Cheesecake Cookie Cups combine rich, chocolatey cookie cups with a luscious, no-bake Oreo cheesecake filling.
Perfect for parties, dessert tables, or just treating yourself, this recipe is easy to follow and yields bite-sized delights everyone will love.
I’m excited to share this recipe with you because it’s a delicious way to enjoy the best of both worlds — crunchy chocolate cookies and smooth cheesecake — all in one handheld cup. Ready to impress your friends and family? Let’s dive in!
Ingredients List
For the Cookie Cups:
- 2 cups all-purpose flour
- ¼ cup Dutch-processed cocoa powder
- ¼ cup black cocoa powder
- 1 teaspoon baking soda
- ½ teaspoon salt
- 1 cup unsalted butter, room temperature
- ½ cup granulated sugar
- 1 cup light brown sugar, packed
- 2 large eggs, room temperature
- 1 teaspoon vanilla extract
For the Oreo Cheesecake Filling:
- 1 cup heavy whipping cream, chilled
- 8 oz full-fat cream cheese, softened
- ½ cup granulated sugar
- ¾ cup Oreo cookie crumbs (about 10–12 Oreos crushed)
Required Kitchen Tools
To make these Oreo Cheesecake Cookie Cups effortlessly, having the right tools on hand is a game-changer. Here’s what you’ll need:
- Stand Mixer or Hand Mixer – For creaming butter and sugar, and whipping cream to stiff peaks. This saves time and ensures smooth textures.
- Mixing Bowls – Multiple sizes for dry ingredients, wet ingredients, and filling.
- Measuring Cups and Spoons – Accuracy is key in baking!
- Muffin Tin – Standard 12-cup muffin pan to shape the cookie cups perfectly.
- Parchment Paper or Non-stick Spray – To grease the muffin tin for easy cookie cup removal.
- Wire Cooling Rack – For cooling cookie cups evenly after baking.
- Spatula and Whisk – For mixing and folding ingredients gently.
- Food Processor or Plastic Bag & Rolling Pin – To crush Oreos into fine crumbs for the cheesecake filling.
Cookie Cup Preparation
Here’s how I create the perfect chocolate cookie cups that hold all the creamy goodness:
Step 1: Preheat & Prep
Preheat your oven to 350°F (175°C). Grease your muffin tins well with non-stick spray or butter to make sure the cookie cups release easily later.
Step 2: Combine Dry Ingredients
In a medium bowl, whisk together 2 cups all-purpose flour, ¼ cup Dutch-processed cocoa powder, ¼ cup black cocoa powder, 1 teaspoon baking soda, and ½ teaspoon salt. This cocoa combo gives the cookie cups a deep, rich chocolate flavor.
Step 3: Cream Butter and Sugars
Using your mixer, beat 1 cup softened unsalted butter with ½ cup granulated sugar and 1 cup packed light brown sugar until the mixture is light and fluffy — about 3-5 minutes. This step is crucial for that tender cookie texture.
Step 4: Add Eggs & Vanilla
Beat in 2 large eggs, one at a time, then add 1 teaspoon vanilla extract. Mix until fully incorporated.
Step 5: Combine Wet & Dry
Gradually add the dry ingredient mixture into the wet ingredients, mixing just until combined. Be careful not to overmix or your cookies will be tough.
Step 6: Shape the Cookie Cups
Scoop the cookie dough into each muffin cup, pressing down slightly to form a small well in the center for the cheesecake filling later. Make sure the dough spreads evenly along the sides and bottom for sturdy cups.
Step 7: Bake & Cool
Bake for 10–13 minutes until the edges are set but the centers are still soft. Remove from oven and immediately press the back of a spoon into the center of each cookie to deepen the wells while the dough is warm. Let cool in the pan for 10 minutes, then transfer to a wire rack to cool completely.
Oreo Cheesecake Filling Preparation
Now for the best part — that creamy, dreamy cheesecake filling packed with Oreo cookie bits!
Step 1: Whip the Cream
In a chilled mixing bowl, whip 1 cup of heavy whipping cream using a hand or stand mixer until stiff peaks form. This will give your filling a light, airy texture.
Step 2: Beat the Cream Cheese and Sugar
In a separate bowl, beat 8 oz softened full-fat cream cheese with ½ cup granulated sugar until the mixture is smooth and creamy. Make sure there are no lumps for a velvety filling.
Step 3: Mix in Oreo Crumbs
Gently fold in ¾ cup finely crushed Oreo cookie crumbs into the cream cheese mixture. This adds that iconic Oreo crunch and flavor.
Step 4: Fold in Whipped Cream
Carefully fold the whipped cream into the cream cheese and Oreo mixture. Be gentle to keep the filling light and fluffy — no one wants dense cheesecake filling!
Assembling the Oreo Cheesecake Cookie Cups
Step 1: Fill the Cookie Cups
Using a spoon or piping bag, fill each cooled cookie cup with the cheesecake mixture. Fill them generously for a perfect balance of cookie and cream.
Step 2: Chill to Set
Place the filled cookie cups in the refrigerator for at least 1–2 hours to let the cheesecake filling firm up nicely. This chilling step helps the flavors meld and the texture set.
Serving and Decoration Ideas
These Oreo Cheesecake Cookie Cups are already a showstopper, but adding some finishing touches can make them irresistible.
- Top with Oreo Crumbs: Sprinkle extra crushed Oreos on top for added crunch and visual appeal.
- Drizzle with Chocolate: Melt some semi-sweet or dark chocolate and drizzle it over the filled cookie cups for a glossy finish.
- Add Whipped Cream: Pipe a small swirl of fresh whipped cream on each cup before serving for an elegant look.
- Fresh Berries: Add a few raspberries or strawberries to cut through the richness with a fresh, fruity note.
Serving these chilled will give you the best texture and flavor experience, making them perfect for parties, potlucks, or any sweet craving.
Storage Instructions
How to Store
Keep any leftover Oreo Cheesecake Cookie Cups refrigerated in an airtight container. They’ll stay fresh for up to 3 days, perfect for enjoying over the weekend.
Freezing Tips
If you want to save some for later, you can freeze the cookie cups without the cheesecake filling. Wrap them tightly and freeze for up to 1 month. When ready, thaw at room temperature and then fill with cheesecake mixture before serving.
Oreo Cheesecake Cookie Cups
Equipment
- Stand Mixer or Hand Mixer
- Mixing Bowls
- Measuring Cups and Spoons
- Muffin Tin
- Parchment Paper or Non-stick Spray
- Wire Cooling Rack
- Spatula and Whisk
- Food Processor or Plastic Bag & Rolling Pin
Ingredients
For the Cookie Cups
- 2 cups all-purpose flour
- ¼ cup Dutch-processed cocoa powder
- ¼ cup black cocoa powder
- 1 teaspoon baking soda
- ½ teaspoon salt
- 1 cup unsalted butter, room temperature
- ½ cup granulated sugar
- 1 cup light brown sugar, packed
- 2 large eggs, room temperature
- 1 teaspoon vanilla extract
For the Oreo Cheesecake Filling
- 1 cup heavy whipping cream, chilled
- 8 oz full-fat cream cheese, softened
- ½ cup granulated sugar
- ¾ cup Oreo cookie crumbs (about 10–12 Oreos crushed)
Instructions
Cookie Cup Preparation
- Preheat your oven to 350°F (175°C). Grease your muffin tins well with non-stick spray or butter to make sure the cookie cups release easily later.
- In a medium bowl, whisk together 2 cups all-purpose flour, ¼ cup Dutch-processed cocoa powder, ¼ cup black cocoa powder, 1 teaspoon baking soda, and ½ teaspoon salt. This cocoa combo gives the cookie cups a deep, rich chocolate flavor.
- Using your mixer, beat 1 cup softened unsalted butter with ½ cup granulated sugar and 1 cup packed light brown sugar until the mixture is light and fluffy — about 3-5 minutes. This step is crucial for that tender cookie texture.
- Beat in 2 large eggs, one at a time, then add 1 teaspoon vanilla extract. Mix until fully incorporated.
- Gradually add the dry ingredient mixture into the wet ingredients, mixing just until combined. Be careful not to overmix or your cookies will be tough.
- Scoop the cookie dough into each muffin cup, pressing down slightly to form a small well in the center for the cheesecake filling later. Make sure the dough spreads evenly along the sides and bottom for sturdy cups.
- Bake for 10–13 minutes until the edges are set but the centers are still soft. Remove from oven and immediately press the back of a spoon into the center of each cookie to deepen the wells while the dough is warm. Let cool in the pan for 10 minutes, then transfer to a wire rack to cool completely.
Oreo Cheesecake Filling Preparation
- In a chilled mixing bowl, whip 1 cup of heavy whipping cream using a hand or stand mixer until stiff peaks form. This will give your filling a light, airy texture.
- In a separate bowl, beat 8 oz softened full-fat cream cheese with ½ cup granulated sugar until the mixture is smooth and creamy. Make sure there are no lumps for a velvety filling.
- Gently fold in ¾ cup finely crushed Oreo cookie crumbs into the cream cheese mixture. This adds that iconic Oreo crunch and flavor.
- Carefully fold the whipped cream into the cream cheese and Oreo mixture. Be gentle to keep the filling light and fluffy — no one wants dense cheesecake filling!
Conclusion
Making Oreo Cheesecake Cookie Cups is a delightful way to combine two beloved desserts into one decadent treat.
With a fudgy chocolate cookie base and creamy Oreo-studded cheesecake filling, these cups are sure to become a favorite go-to dessert. Follow this easy recipe, and you’ll impress your friends and family with every bite!