Craving a crispy, juicy bite that brings back childhood memories? Let me show you how to make Homemade Chicken Nuggets that are tender on the inside, crunchy on the outside, and packed with real flavor.
These golden nuggets are so much better than anything you’ll find in the freezer aisle—plus, you know exactly what’s going into them! With a buttermilk marinade, seasoned flour, and a crispy Panko breadcrumb coating, these nuggets are perfect for kids and adults alike.
Whether you’re prepping for a family dinner, a weekend snack, or a crowd-pleasing party appetizer, this easy chicken nugget recipe will hit the spot.
Ingredients List
Chicken Nugget Ingredients
- 2 lbs. boneless, skinless chicken breasts or chicken tenderloins (cut into bite-sized pieces)
- 2 large eggs
- ¾ cup buttermilk
- 1 cup all-purpose flour
- ½ teaspoon baking soda
- ½ teaspoon onion powder
- ½ teaspoon garlic powder
- ½ teaspoon salt
- ¼ teaspoon black pepper
- 3 cups Panko breadcrumbs
- 4 cups peanut or vegetable oil (for frying)
Required Kitchen Tools
Before we dive into frying up some golden goodness, make sure you have these essential tools on hand for a smooth cooking experience:
- Large Mixing Bowls – You’ll need a few bowls for breading the chicken (one for flour, one for egg mixture, and one for breadcrumbs).
- Ziploc Bag or Large Bowl with Lid – For tossing the chicken in the seasoned flour without making a mess.
- Tongs – Perfect for flipping chicken in hot oil without splashing.
- Wire Rack + Sheet Tray – Letting the chicken nuggets rest here before and after frying helps maintain that crispy crust.
- Cast-Iron Skillet or Dutch Oven – These hold heat well and are ideal for shallow frying.
- Kitchen Thermometer – To monitor the oil temperature and avoid soggy or overcooked nuggets.
- Paper Towels – For draining excess oil and keeping the nuggets crispy.
Coating and Breading the Chicken Nuggets
Getting that irresistible crunch starts with a solid breading process. In this step, we’ll layer flavor and texture to make sure every nugget turns out golden, crispy, and deeply satisfying.
Step 1: Season the Flour
In a large Ziploc bag or mixing bowl, I combine the flour, baking soda, onion powder, garlic powder, salt, and black pepper. This seasoned flour acts as the first layer of flavor and helps the buttermilk and egg mixture stick to the chicken.
Step 2: Prepare the Wet Dip
Next, in a shallow bowl, I whisk together eggs and buttermilk until smooth. The buttermilk tenderizes the chicken while the eggs help everything adhere perfectly during breading.
Step 3: Set Up the Breadcrumb Station
In another shallow bowl, I pour out the Panko breadcrumbs. I love using Panko because it creates a light, airy crunch that regular breadcrumbs just can’t match.
Step 4: Dredge and Bread the Chicken
Now comes the fun part! I add the chicken pieces to the Ziploc bag with the seasoned flour. After sealing the bag, I give it a good shake until each piece is coated evenly. Then, I work in batches:
- Dip each flour-coated chicken piece into the buttermilk and egg mixture.
- Roll it around in the Panko breadcrumbs, pressing gently to help the crumbs stick.
- Place the breaded nuggets onto a wire rack. This resting step helps the coating set before frying, which means less breading loss in the oil and more crunch on your plate.
Once all the nuggets are coated and resting, it’s time to move on to the best part—frying them to perfection.
Frying the Chicken Nuggets
Frying is where the magic happens. This step transforms those breaded bites into golden, crispy, juicy chicken nuggets that are seriously hard to resist.
Step 1: Heat the Oil
In a large cast-iron skillet or Dutch oven, I pour in about 4 cups of peanut or vegetable oil. I use a kitchen thermometer to monitor the temperature, aiming for a steady 350°F (175°C). Keeping the oil at the right temp ensures the nuggets cook evenly and don’t soak up excess oil.
Step 2: Fry in Batches
Once the oil is ready, I gently lower a few nuggets into the pan—no more than 5–6 at a time to avoid overcrowding. This helps maintain the oil temperature and gives each nugget enough space to get crispy.
I fry each batch for 2–3 minutes total, flipping the nuggets halfway through with tongs. They should be deep golden brown and cooked through (internal temp should hit 165°F).
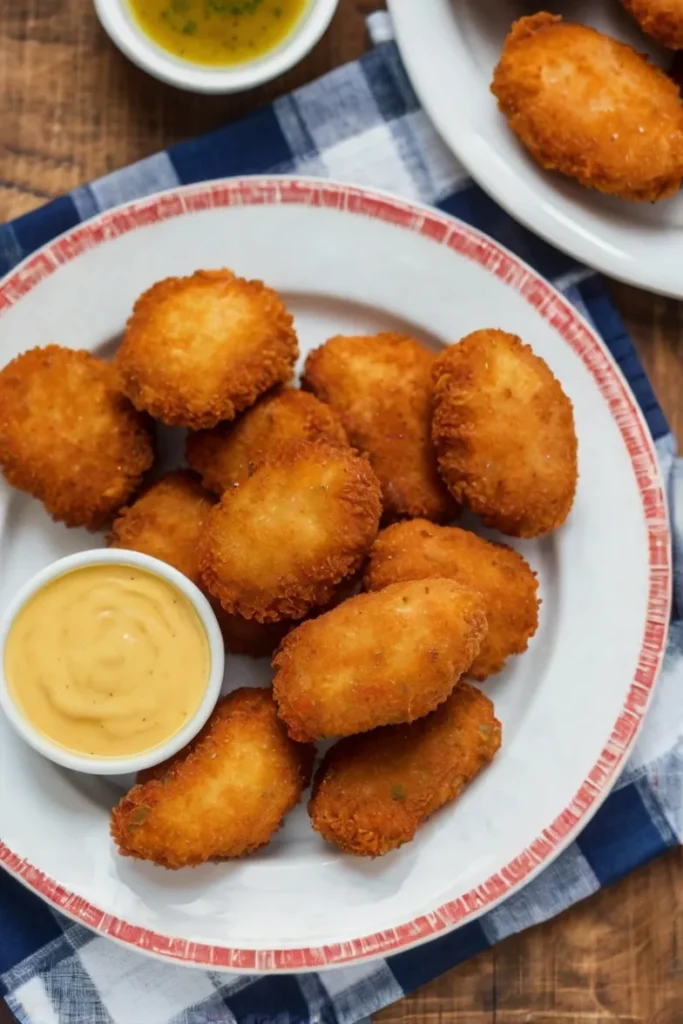
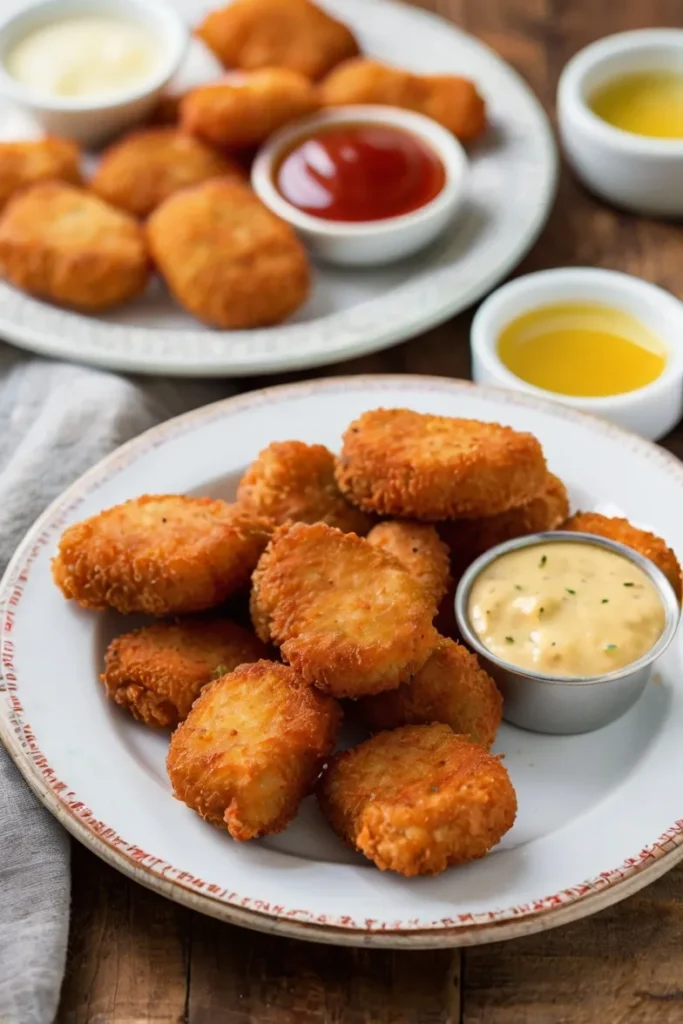
Step 3: Drain and Season
Using a slotted spoon or tongs, I transfer the fried nuggets onto a paper towel-lined tray to drain excess oil. While they’re still hot, I give them a light sprinkle of salt to boost the flavor.
Step 4: Keep Warm (Optional)
If I’m cooking a big batch, I keep the finished nuggets warm in a 200°F oven while I fry the rest. Just place them on a wire rack over a baking sheet—this keeps them crispy without steaming.
Frying takes a bit of attention, but the payoff is huge—crispy, golden nuggets that taste way better than takeout.
Serving, Storing & Final Thoughts
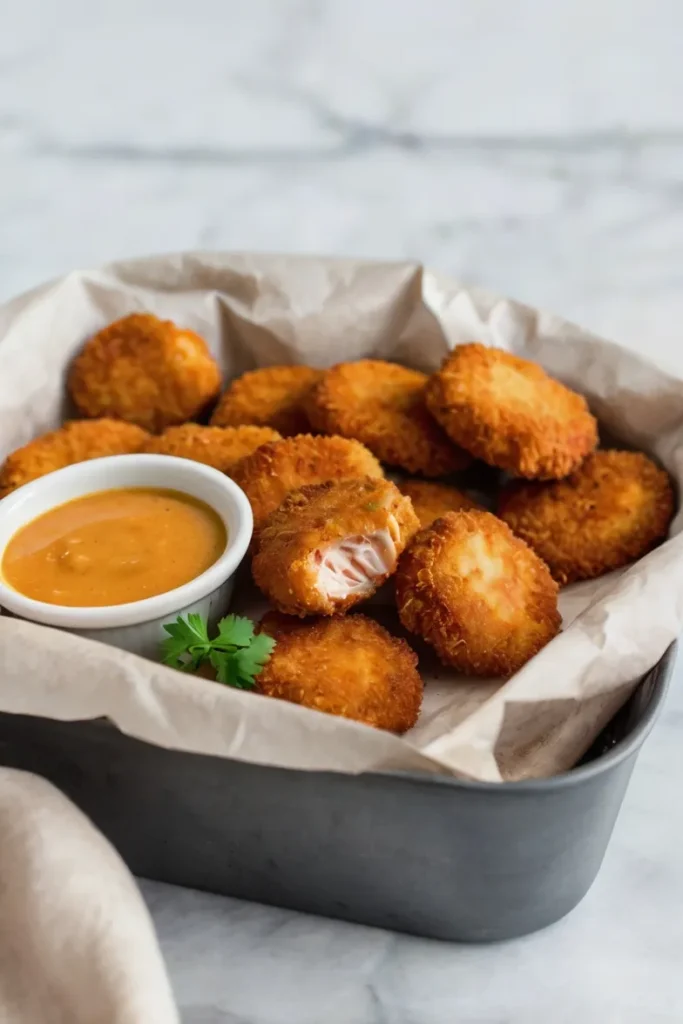
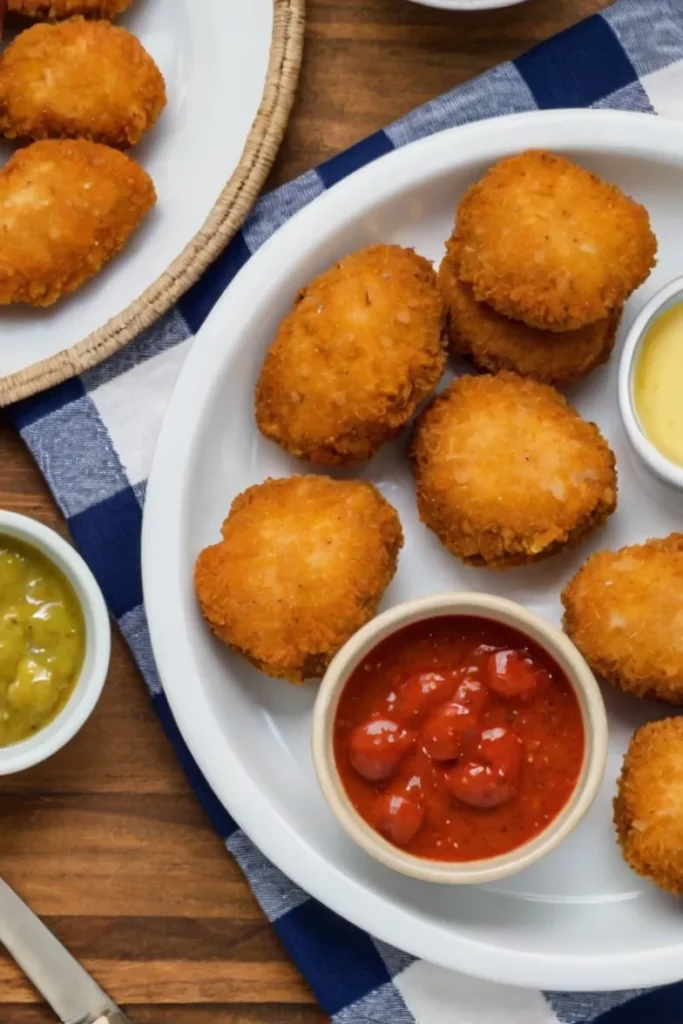
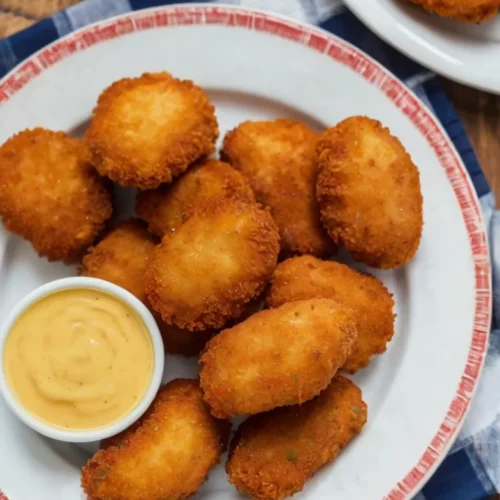
You’ve made it—crispy, juicy homemade chicken nuggets, hot and fresh from your kitchen! Now let’s talk about the best ways to serve them, how to store leftovers (if you have any!), and a few helpful notes to keep in mind.
Serving Suggestions
These chicken nuggets are incredibly versatile. Here are a few ways I love serving them:
- Classic Style: Pair them with ketchup, BBQ sauce, honey mustard, or ranch dressing.
- Game Day Platter: Serve with waffle fries, celery sticks, and a spicy buffalo dip.
- Kid-Friendly Meal: Add mac and cheese or buttered corn on the side for a fun and satisfying plate.
- Chicken Nugget Wraps: Wrap the nuggets in tortillas with lettuce, tomato, and your favorite sauce for a quick lunch idea.
They’re also perfect for meal prepping—you can reheat a few and throw them on top of a salad or in a lunchbox.
How to Store Homemade Chicken Nuggets
If you end up with leftovers (lucky you!), here’s how to keep them fresh:
- Refrigerator: Store the cooled nuggets in an airtight container for up to 3 days. Reheat in the oven or air fryer at 375°F for 5–7 minutes to keep them crispy.
- Freezer: Place the cooled nuggets in a single layer on a baking sheet and freeze until solid. Then transfer to a freezer-safe bag or container. They’ll keep for up to 1 month. Reheat directly from frozen in a 400°F oven for 12–15 minutes.
Final Notes
One thing to remember: it’s tough to calculate exact nutrition for fried recipes since oil absorption can vary. Based on typical absorption, I estimate about ½ cup of oil is used during frying. Actual results may vary depending on cooking method, oil temperature, and breading thickness.
Homemade Chicken Nuggets Recipe
Equipment
- Large Mixing Bowls
- Ziploc Bag or Large Bowl with Lid
- Tongs
- Wire Rack + Sheet Tray
- Cast-Iron Skillet or Dutch Oven
- Kitchen Thermometer
- Paper Towels
Ingredients
- 2 lbs . boneless, skinless chicken breasts or chicken tenderloins (cut into bite-sized pieces)
- 2 large eggs
- ¾ cup buttermilk
- 1 cup all-purpose flour
- ½ teaspoon baking soda
- ½ teaspoon onion powder
- ½ teaspoon garlic powder
- ½ teaspoon salt
- ¼ teaspoon black pepper
- 3 cups Panko breadcrumbs
- 4 cups peanut or vegetable oil (for frying)
Instructions
Coating and Breading the Chicken Nuggets
- In a large Ziploc bag or mixing bowl, I combine the flour, baking soda, onion powder, garlic powder, salt, and black pepper. This seasoned flour acts as the first layer of flavor and helps the buttermilk and egg mixture stick to the chicken.
- Next, in a shallow bowl, I whisk together eggs and buttermilk until smooth. The buttermilk tenderizes the chicken while the eggs help everything adhere perfectly during breading.
- In another shallow bowl, I pour out the Panko breadcrumbs. I love using Panko because it creates a light, airy crunch that regular breadcrumbs just can’t match.
- Now comes the fun part! I add the chicken pieces to the Ziploc bag with the seasoned flour. After sealing the bag, I give it a good shake until each piece is coated evenly. Then, I work in batches:
- Dip each flour-coated chicken piece into the buttermilk and egg mixture.Roll it around in the Panko breadcrumbs, pressing gently to help the crumbs stick.Place the breaded nuggets onto a wire rack. This resting step helps the coating set before frying, which means less breading loss in the oil and more crunch on your plate.
Frying the Chicken Nuggets
- In a large cast-iron skillet or Dutch oven, I pour in about 4 cups of peanut or vegetable oil. I use a kitchen thermometer to monitor the temperature, aiming for a steady 350°F (175°C). Keeping the oil at the right temp ensures the nuggets cook evenly and don’t soak up excess oil.
- Once the oil is ready, I gently lower a few nuggets into the pan—no more than 5–6 at a time to avoid overcrowding. This helps maintain the oil temperature and gives each nugget enough space to get crispy. I fry each batch for 2–3 minutes total, flipping the nuggets halfway through with tongs. They should be deep golden brown and cooked through (internal temp should hit 165°F).
- Using a slotted spoon or tongs, I transfer the fried nuggets onto a paper towel-lined tray to drain excess oil. While they’re still hot, I give them a light sprinkle of salt to boost the flavor.
- If I’m cooking a big batch, I keep the finished nuggets warm in a 200°F oven while I fry the rest. Just place them on a wire rack over a baking sheet—this keeps them crispy without steaming.
Conclusion
Making homemade chicken nuggets is easier than you might think—and so rewarding. With a few basic ingredients, a little prep, and a hot skillet, you can enjoy crispy, golden nuggets that are full of real flavor and made with love. Whether you’re serving them up for a crowd, packing school lunches, or treating yourself to a nostalgic snack, this recipe is one you’ll come back to again and again.