Craving a nostalgic bite of something buttery, nutty, and sweet? Let me introduce you to one of my all-time favorite holiday cookies: Russian Tea Cakes.
These delicate, melt-in-your-mouth cookies are a timeless treat often associated with Christmas, but honestly, I make them year-round.
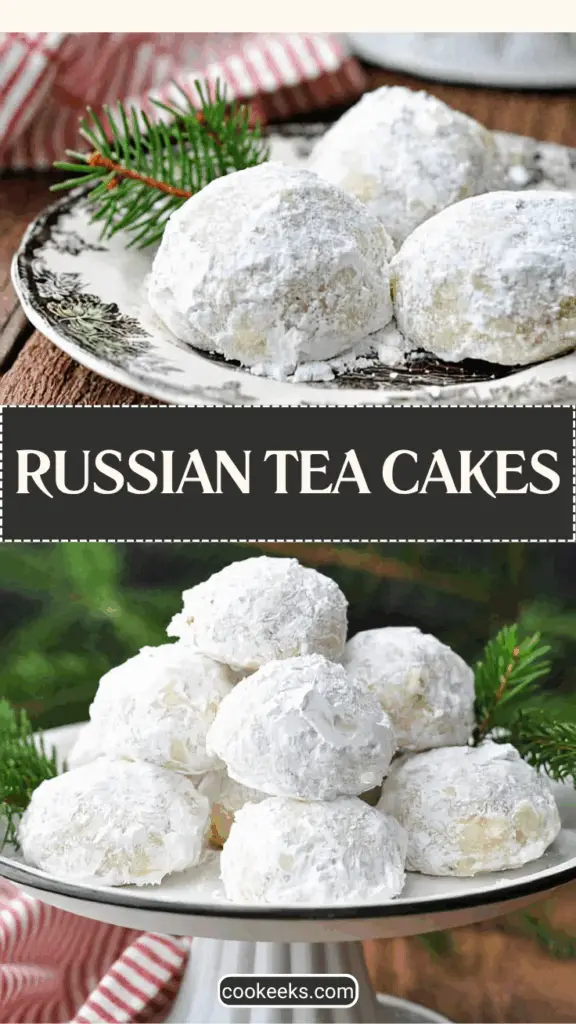
Known by many names—Mexican Wedding Cookies, Snowballs, or Butterballs—they’re simple to make and absolutely irresistible.
With a rich buttery base, a hint of vanilla and almond, and the crunch of finely chopped walnuts, each bite is pure bliss.
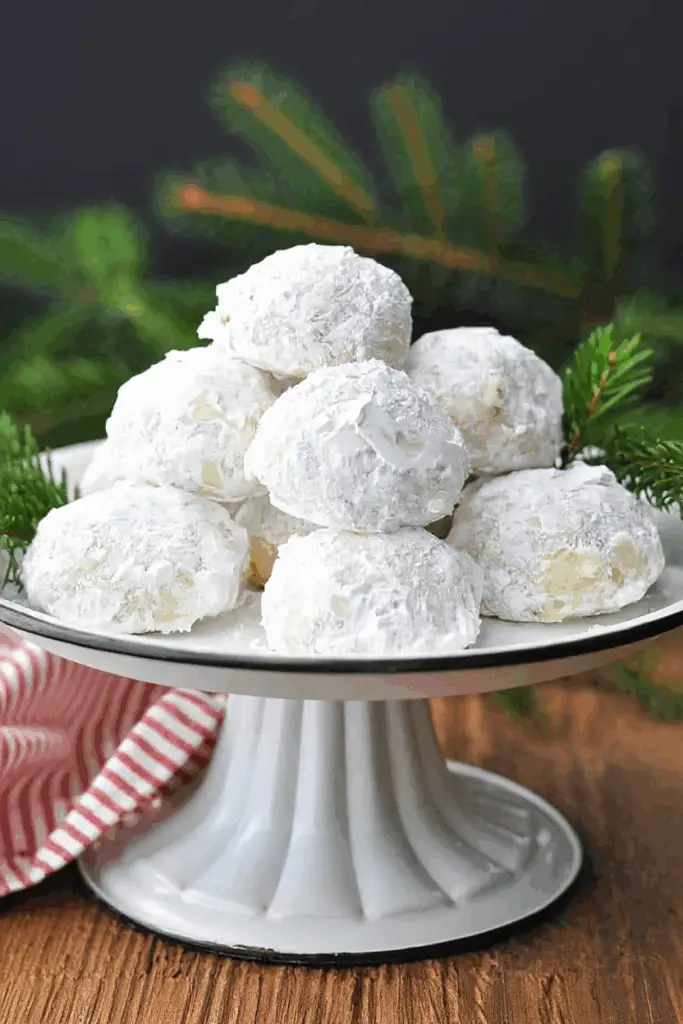
Plus, they’re coated in a snowy layer of powdered sugar that makes them look just as good as they taste.
Let’s dive into how to make the perfect batch of Russian Tea Cakes from scratch.
Ingredients List
Here’s everything you’ll need to bake a fresh batch of these classic cookies:
- 1 cup (2 sticks) salted butter, softened
- 1 teaspoon vanilla extract
- ½ teaspoon almond flavor
- ½ cup granulated sugar
- 2 ¼ cups all-purpose flour
- ¼ teaspoon baking soda
- ¼ teaspoon salt
- ¾ cup finely chopped walnuts
- ½ cup powdered sugar, for rolling (plus more if needed)
These ingredients come together to create a rich, crumbly dough that bakes into soft, buttery cookies with just the right amount of sweetness.
Required Kitchen Tools
Before we get baking, here are the tools I always have ready when making Russian Tea Cakes:
- Electric Mixer – A stand or hand mixer works great for creaming the butter and sugar together.
- Mixing Bowls – One large and one medium for separating dry and wet ingredients.
- Baking Sheets – Lined with parchment paper or silicone mats for easy cleanup and even baking.
- Cookie Scoop or Spoon – To ensure your cookies are uniform in size.
- Wire Cooling Racks – Essential for cooling the cookies before their final sugar coat.
- Sifter or Fine Mesh Strainer – Helps get a smooth, even dusting of powdered sugar.
Dough Preparation
Making Russian Tea Cakes is incredibly straightforward, and the dough comes together in just a few easy steps. Here’s how I do it every time for soft, tender cookies that never disappoint.
Creaming the Butter and Sugar
Start by preheating your oven to 400°F (200°C). In a large mixing bowl, use your electric mixer to beat softened butter, vanilla extract, almond flavor, and granulated sugar until the mixture is light and fluffy. This usually takes about 2–3 minutes on medium speed. The creamed butter acts as the base for the cookies and ensures a melt-in-your-mouth texture.
Mixing the Dry Ingredients
In a separate bowl, whisk together the all-purpose flour, baking soda, and salt. Gradually add the dry mixture to your creamed butter mixture. At first, the dough might look dry and crumbly—don’t worry, that’s completely normal. Just keep mixing until it begins to come together into a thick dough.
Folding in the Walnuts
Once your dough is well combined, fold in the finely chopped walnuts. Make sure the nuts are distributed evenly throughout the dough. This gives the cookies a delightful crunch and a subtle nutty flavor in every bite.
Shaping the Cookies
When your dough is ready, it’s time to shape the cookies:
- Portion the Dough: Using a cookie scoop or spoon, portion the dough into balls about the size of a golf ball (approximately 1 inch in diameter).
- Place on Baking Sheets: Arrange the dough balls about 1 inch apart on your lined baking sheets. These cookies don’t spread much, so they can be placed relatively close together.
Baking Time
Bake the cookies in your preheated oven for 10–12 minutes, or until they are just set and firm to the touch. Be careful not to let them brown; Russian Tea Cakes are meant to stay pale. Once baked, let them cool on the baking sheet for a few minutes—just until they’re cool enough to handle but still warm.
Powdered Sugar Coating
The powdered sugar coating is what gives Russian Tea Cakes their signature snowy look and irresistible sweetness. This part is as fun as it is essential—and trust me, rolling warm cookies in sugar is oddly satisfying.
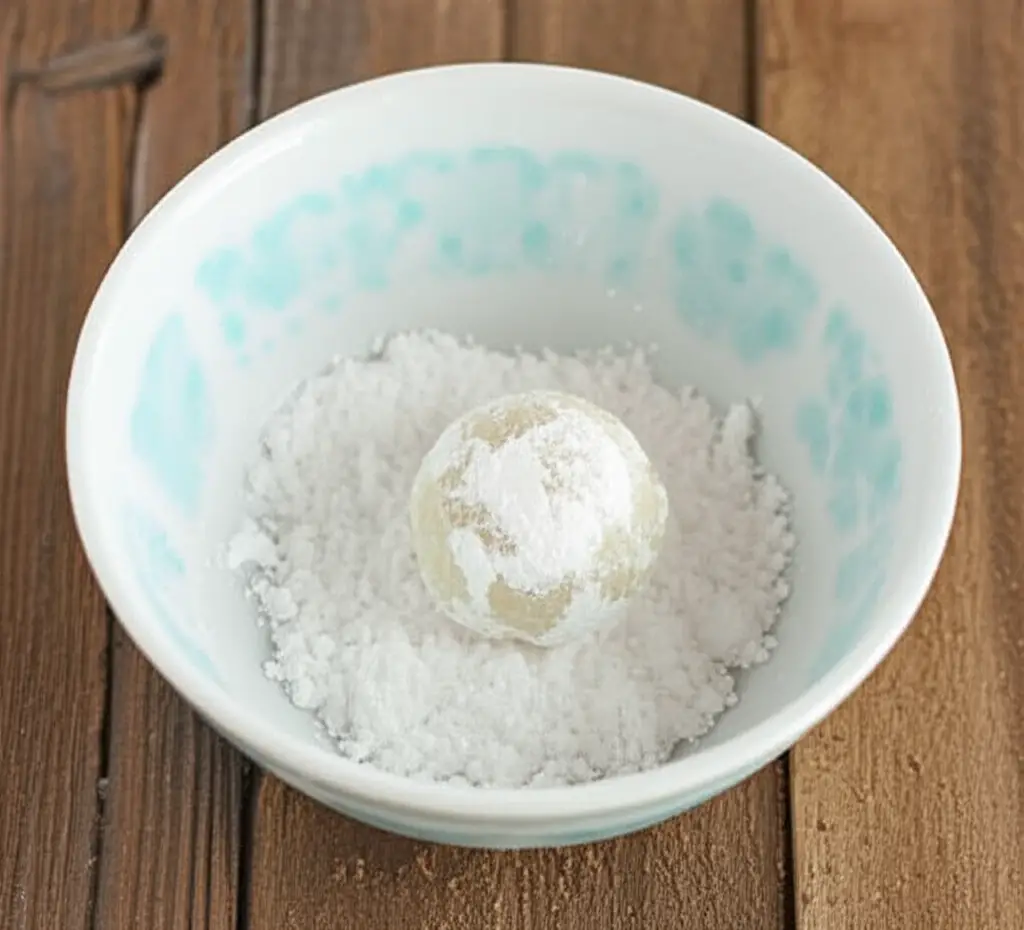
First Coating (While Warm)
As soon as the cookies are cool enough to handle but still slightly warm (about 5 minutes out of the oven), roll each one gently in powdered sugar. The warmth helps the sugar stick and slightly melt into the surface, creating a light, sweet crust.
Use a shallow bowl or plate filled with about ½ cup of powdered sugar. I like to use a spoon or my fingers to coat each cookie thoroughly, making sure every side gets a dusting.
Cooling Completely
After the first coating, transfer the cookies to a wire cooling rack. Let them cool completely—this takes about 15–20 minutes. During this time, the exterior firms up slightly, and the first sugar layer sets in place.
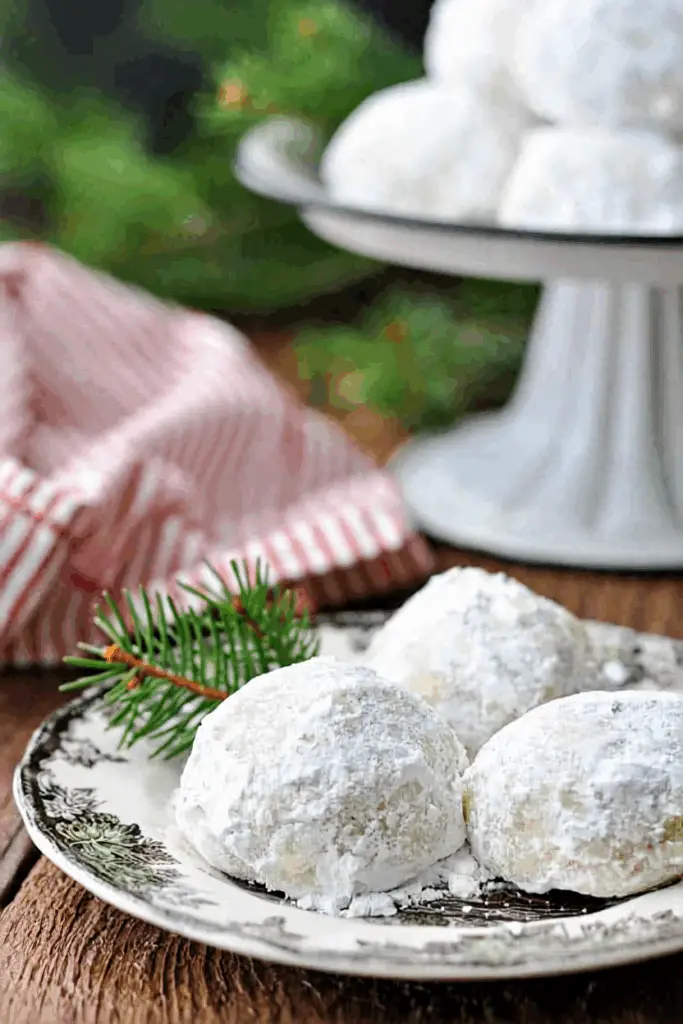
Second Coating (After Cooling)
Once cooled, give the cookies a second roll in powdered sugar. This final dusting creates that thick, beautiful snowball effect and makes the cookies look bakery-perfect. You can also sift a little extra sugar on top for an even more elegant finish.
Serving Suggestions
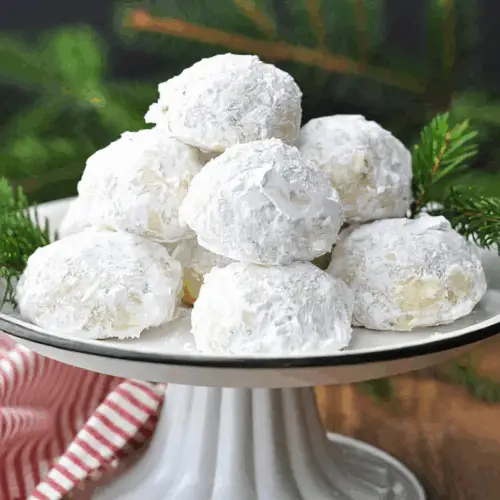
These cookies are made to impress on any cookie tray. Here’s how I love to serve them:
- Holiday Cookie Platters: Russian Tea Cakes are a festive favorite and pair beautifully with other holiday classics like gingerbread, spritz cookies, or thumbprints.
- Afternoon Tea or Coffee: Their delicate texture and buttery flavor make them the perfect companion for a hot cup of coffee or tea.
- Gift Giving: Pack them into cellophane bags or festive tins for homemade gifts that always get rave reviews.
With their melt-in-your-mouth texture and snowy white finish, these cookies bring a touch of elegance and nostalgia to any occasion.
Storage Instructions
How to Keep Russian Tea Cakes Fresh
Russian Tea Cakes store surprisingly well, which is one more reason I always keep a stash on hand. After the cookies have cooled completely and been double-coated in powdered sugar, transfer them to an airtight container. Keep them at room temperature for up to 7 days.
To maintain their texture and flavor:
- Store them in single layers, separated by sheets of parchment or wax paper.
- Avoid storing in humid areas, as moisture can dissolve the sugar coating and make them sticky.
Freezing Russian Tea Cakes
Want to get ahead on your holiday baking or make a bigger batch? Russian Tea Cakes freeze beautifully.
Here’s how I do it:
- Let the cookies cool completely after baking (before any sugar coating).
- Place them in a single layer on a baking sheet and freeze for 1–2 hours.
- Transfer frozen cookies to a freezer-safe zip-top bag or container, with parchment paper between layers.
- Label with the date—they’ll stay fresh for up to 2 months.
When ready to serve, thaw them at room temperature and roll in fresh powdered sugar before serving.
Russian Tea Cakes
Equipment
- Electric Mixer
- Mixing Bowls
- Baking Sheets
- Cookie Scoop or Spoon
- Wire Cooling Racks
- Sifter or Fine Mesh Strainer
Ingredients
- 1 cup (2 sticks) salted butter, softened
- 1 teaspoon vanilla extract
- ½ teaspoon almond flavor
- ½ cup granulated sugar
- 2 ¼ cups all-purpose flour
- ¼ teaspoon baking soda
- ¼ teaspoon salt
- ¾ cup finely chopped walnuts
- ½ cup powdered sugar, for rolling (plus more if needed)
Instructions
Dough Preparation
- Start by preheating your oven to 400°F (200°C). In a large mixing bowl, use your electric mixer to beat softened butter, vanilla extract, almond flavor, and granulated sugar until the mixture is light and fluffy. This usually takes about 2–3 minutes on medium speed. The creamed butter acts as the base for the cookies and ensures a melt-in-your-mouth texture.
- In a separate bowl, whisk together the all-purpose flour, baking soda, and salt. Gradually add the dry mixture to your creamed butter mixture. At first, the dough might look dry and crumbly—don’t worry, that’s completely normal. Just keep mixing until it begins to come together into a thick dough.
- Once your dough is well combined, fold in the finely chopped walnuts. Make sure the nuts are distributed evenly throughout the dough. This gives the cookies a delightful crunch and a subtle nutty flavor in every bite.
- Portion the Dough: Using a cookie scoop or spoon, portion the dough into balls about the size of a golf ball (approximately 1 inch in diameter).Place on Baking Sheets: Arrange the dough balls about 1 inch apart on your lined baking sheets. These cookies don’t spread much, so they can be placed relatively close together.
- Bake the cookies in your preheated oven for 10–12 minutes, or until they are just set and firm to the touch. Be careful not to let them brown; Russian Tea Cakes are meant to stay pale. Once baked, let them cool on the baking sheet for a few minutes—just until they’re cool enough to handle but still warm.
- As soon as the cookies are cool enough to handle but still slightly warm (about 5 minutes out of the oven), roll each one gently in powdered sugar. The warmth helps the sugar stick and slightly melt into the surface, creating a light, sweet crust.Use a shallow bowl or plate filled with about ½ cup of powdered sugar. I like to use a spoon or my fingers to coat each cookie thoroughly, making sure every side gets a dusting.
Conclusion
There’s a reason Russian Tea Cakes have stood the test of time—they’re simple, elegant, and packed with rich, buttery flavor and nutty crunch. Whether you’re making them for a holiday cookie exchange, gifting them to loved ones, or just treating yourself, these cookies never disappoint.
With just a few pantry staples and some easy steps, you can recreate these classic snowball cookies in your own kitchen. Don’t forget to roll them in that magical double coat of powdered sugar for the full experience.
So go ahead—grab your mixer, preheat the oven, and let the sweet scent of homemade Russian Tea Cakes fill your kitchen. One bite, and you’ll see why these little snowballs are a cherished favorite around the world.