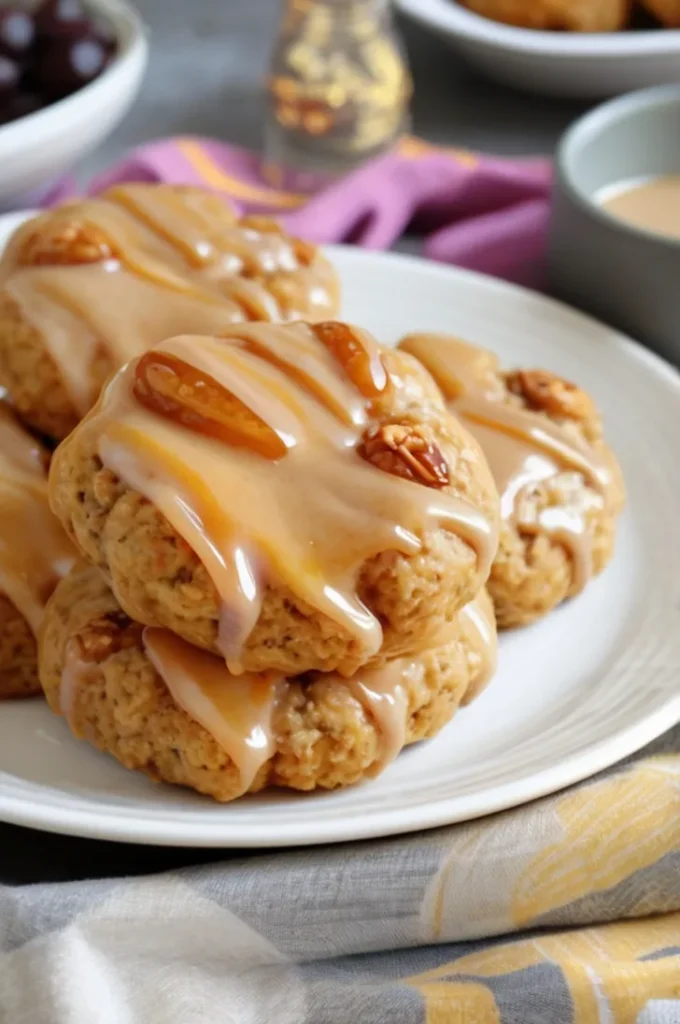
Do you love the taste of a honey bun but want a more portable, breakfast-friendly treat? Look no further! These Glazed Honey Bun Breakfast Cookies combine the soft, cinnamon-sugar flavor of a honey bun with the convenience of a cookie.
They’re perfect for a quick breakfast or snack that will satisfy your sweet tooth without compromising on flavor. Topped with a sweet honey glaze, these cookies will remind you of your favorite morning pastry—without the mess!
Ingredients List
Cookie Ingredients
- 1 (15.5 ounce) can of chickpeas, drained and rinsed
- 1/2 cup almond butter (or peanut butter, or sunflower seed butter)
- 1/3 cup oats
- 1/4 cup pure maple syrup or honey
- 1/4 teaspoon sea salt
- 1 teaspoon baking powder
- 1 teaspoon cinnamon
- 1/4 teaspoon nutmeg
- Optional: 1/2 cup cinnamon chips (white chocolate chips also work great!)
Honey Glaze Ingredients
- 2 tablespoons butter
- 1/4 cup honey
Required Kitchen Tools
When baking these delicious Glazed Honey Bun Breakfast Cookies, having the right kitchen tools can make all the difference. Here’s what you’ll need:
- Food Processor: A food processor is key for combining the ingredients and creating a smooth dough.
- Baking Sheet: You’ll need a baking sheet to bake your cookies. Line it with parchment paper or spray it with non-stick cooking spray for easy cleanup.
- Pastry Brush or Spoon: For spreading the honey glaze on top of your cookies once they’re baked.
- Cooling Rack: To allow the cookies to cool completely and for the glaze to set perfectly.
Having these tools ready will ensure that your cookies bake evenly and look beautiful once glazed.
How to Make Glazed Honey Bun Breakfast Cookies
Creating these honey bun-inspired breakfast cookies is easier than you might think. The combination of simple ingredients and a few straightforward steps will have you enjoying warm, sweet cookies in no time. Let’s dive into the cookie-making process!
Preparing the Cookie Dough
First, gather all your ingredients and start by combining the chickpeas, almond butter, oats, maple syrup (or honey), sea salt, baking powder, cinnamon, and nutmeg in a food processor. Pulse the mixture until a smooth dough forms. The chickpeas give these cookies a soft, chewy texture while providing a boost of protein, making them a great, more filling breakfast treat.
If you want to add a little extra flavor, gently fold in cinnamon chips or white chocolate chips at this point. These little bursts of sweetness will make the cookies even more irresistible!
Shaping the Cookies
Once your dough is ready, it’s time to shape the cookies. Using a heaping tablespoon, scoop the dough onto a baking sheet lined with parchment paper or sprayed with cooking spray. Don’t worry about making perfect shapes—these cookies have a rustic, homemade charm!
Using the back of a spoon, gently press down on each dough ball to flatten it slightly. This step will ensure the cookies bake evenly and develop that lovely soft texture we’re aiming for. You’ll want to bake them for approximately 20 minutes or until they’re golden brown around the edges.
Baking the Cookies
Place your baking sheet in the preheated oven at 350°F (180°C). Bake for 20 minutes, keeping an eye on them towards the end to make sure they don’t overbake. Once they’re done, remove the cookies from the oven and let them cool on the baking sheet for a few minutes before transferring them to a wire rack to cool completely.
While the cookies cool, you can prepare the glaze!
Making the Honey Glaze
The honey glaze is what truly takes these cookies to the next level. It adds a beautiful, sweet shine and a burst of honey flavor that makes each bite feel like a special treat.
Preparing the Glaze
To make the glaze, start by melting the butter in a small saucepan over medium heat. Once the butter has melted, add the honey and bring the mixture to a gentle boil. Reduce the heat and let it simmer for 2-3 minutes. This allows the flavors to meld together, creating a rich, glossy glaze that will soak into the warm cookies perfectly.
Once the glaze has simmered, remove the saucepan from the heat and allow it to cool slightly. The glaze should still be pourable but not too hot when you apply it to your cookies.
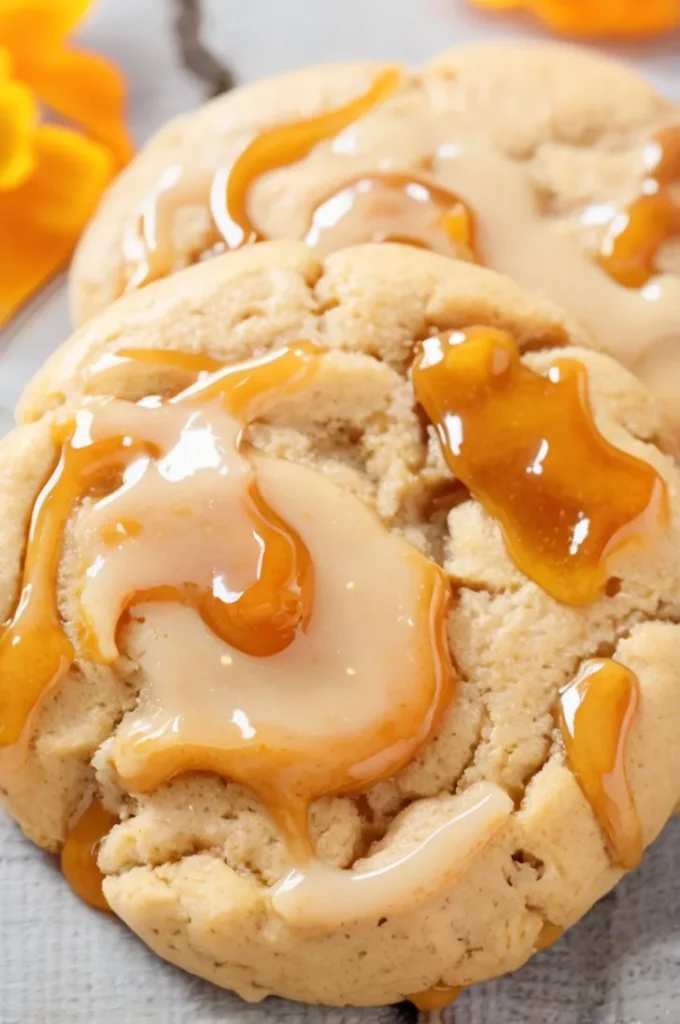
Glazing the Cookies
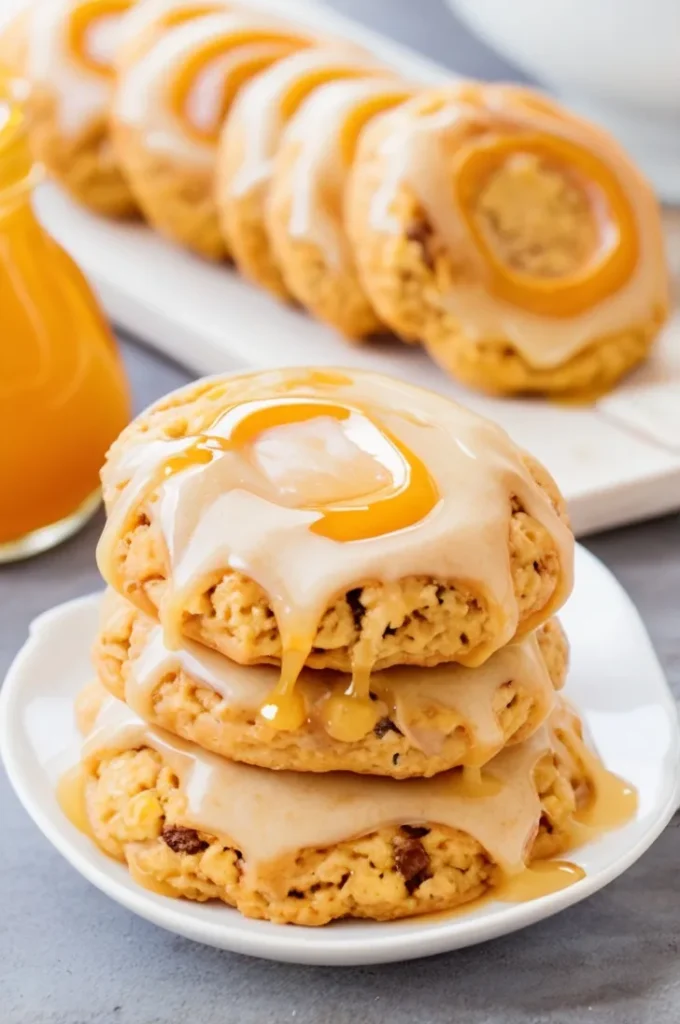
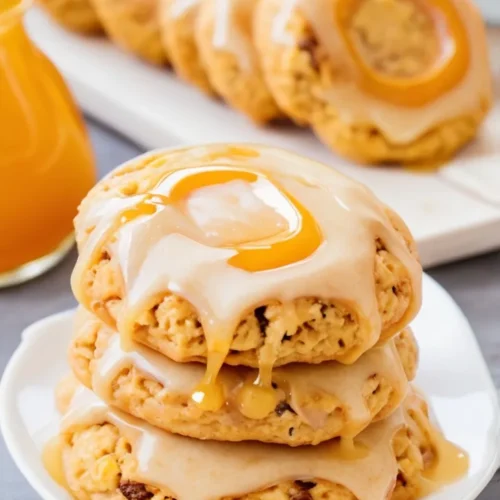
Now comes the fun part! Use a pastry brush or a spoon to drizzle or brush the glaze over each cooled cookie. Be sure to coat each cookie evenly to get that beautiful honey bun look. The glaze will set as it cools, leaving a delicious, sticky-sweet finish on each cookie.
After glazing, place the cookies on a wire rack and let them sit until the glaze has completely set. This step is crucial as it helps the glaze harden slightly, ensuring it stays on the cookies rather than dripping off.
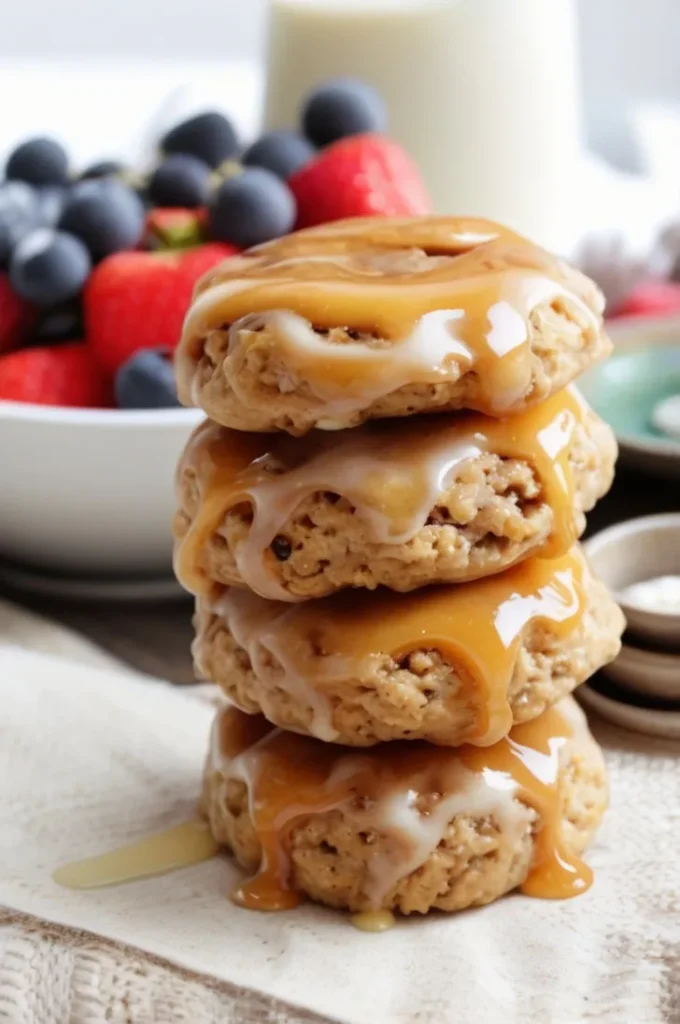
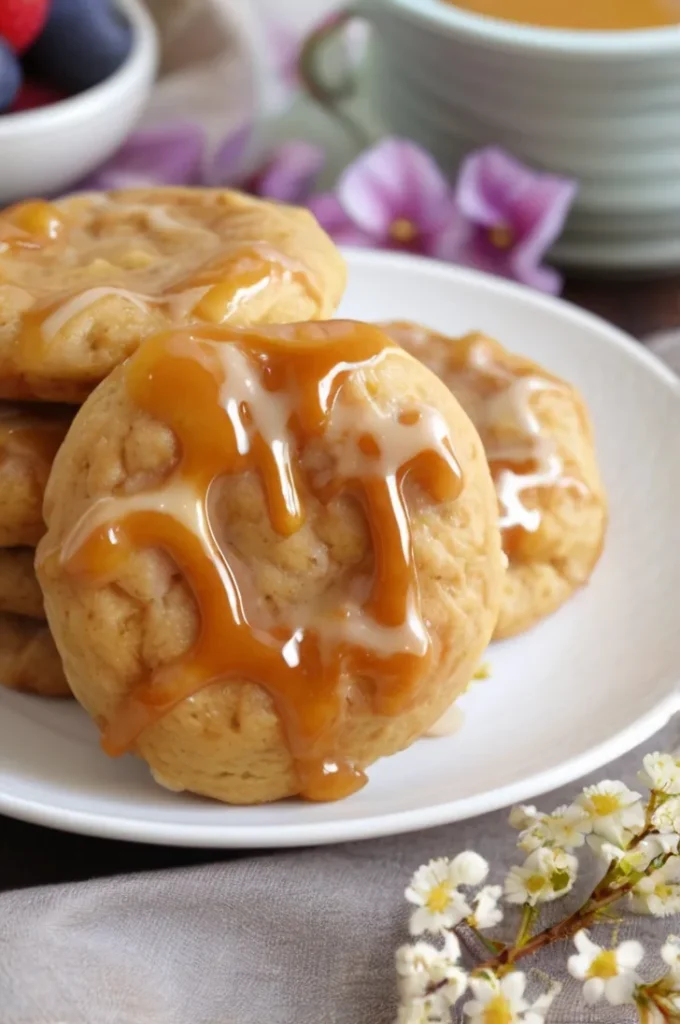
Serving and Storing Your Glazed Honey Bun Breakfast Cookies
Once the glaze has set, your Glazed Honey Bun Breakfast Cookies are ready to enjoy! These cookies are perfect for breakfast, a mid-day snack, or even an afternoon treat with a cup of coffee or tea. Their soft texture, combined with the sweet honey glaze, makes them irresistible.
Serving Tips
These cookies are already packed with flavor, but if you want to make them even more decadent, consider adding a sprinkle of extra cinnamon or a dusting of powdered sugar on top before serving. You can also serve them alongside a bowl of fresh fruit or a dollop of yogurt for a more balanced breakfast.
They also make a wonderful addition to any brunch spread or as a homemade gift for friends and family. Just make sure to store them properly so they stay fresh!
Storage Instructions
To keep your Glazed Honey Bun Breakfast Cookies fresh, store them in an airtight container at room temperature. They will stay soft and delicious for up to 3 days. If you’re not planning on eating them all right away, you can also freeze them for later.
Freezing the Cookies
To freeze, place the cookies in a freezer-safe bag or container, making sure to remove any excess air. These cookies can be stored in the freezer for up to a month. When you’re ready to enjoy them, simply thaw them at room temperature or give them a quick reheat in the oven for a warm, freshly baked experience.
Glazed Honey Bun Breakfast Cookies
Equipment
- Food Processor
- Baking Sheet
- Pastry Brush or Spoon
- Cooling Rack
Ingredients
Cookie Ingredients
- 1 (15.5 ounce) can of chickpeas, drained and rinsed
- 1/2 cup almond butter (or peanut butter, or sunflower seed butter)
- 1/3 cup oats
- 1/4 cup pure maple syrup or honey
- 1/4 teaspoon sea salt
- 1 teaspoon baking powder
- 1 teaspoon cinnamon
- 1/4 teaspoon nutmeg
- Optional: 1/2 cup cinnamon chips (white chocolate chips also work great!)
Honey Glaze Ingredients
- 2 tablespoons butter
- 1/4 cup honey
Instructions
Preparing the Cookie Dough
- First, gather all your ingredients and start by combining the chickpeas, almond butter, oats, maple syrup (or honey), sea salt, baking powder, cinnamon, and nutmeg in a food processor. Pulse the mixture until a smooth dough forms. The chickpeas give these cookies a soft, chewy texture while providing a boost of protein, making them a great, more filling breakfast treat.
- If you want to add a little extra flavor, gently fold in cinnamon chips or white chocolate chips at this point. These little bursts of sweetness will make the cookies even more irresistible!
Shaping the Cookies
- Once your dough is ready, it’s time to shape the cookies. Using a heaping tablespoon, scoop the dough onto a baking sheet lined with parchment paper or sprayed with cooking spray. Don’t worry about making perfect shapes—these cookies have a rustic, homemade charm!
- Using the back of a spoon, gently press down on each dough ball to flatten it slightly. This step will ensure the cookies bake evenly and develop that lovely soft texture we’re aiming for. You’ll want to bake them for approximately 20 minutes or until they’re golden brown around the edges.
Baking the Cookies
- Place your baking sheet in the preheated oven at 350°F (180°C). Bake for 20 minutes, keeping an eye on them towards the end to make sure they don’t overbake. Once they’re done, remove the cookies from the oven and let them cool on the baking sheet for a few minutes before transferring them to a wire rack to cool completely While the cookies cool, you can prepare the glaze!
Preparing the Glaze
- To make the glaze, start by melting the butter in a small saucepan over medium heat. Once the butter has melted, add the honey and bring the mixture to a gentle boil. Reduce the heat and let it simmer for 2-3 minutes. This allows the flavors to meld together, creating a rich, glossy glaze that will soak into the warm cookies perfectly.
- Once the glaze has simmered, remove the saucepan from the heat and allow it to cool slightly. The glaze should still be pourable but not too hot when you apply it to your cookies.
Glazing the Cookies
- Now comes the fun part! Use a pastry brush or a spoon to drizzle or brush the glaze over each cooled cookie. Be sure to coat each cookie evenly to get that beautiful honey bun look. The glaze will set as it cools, leaving a delicious, sticky-sweet finish on each cookie.
- After glazing, place the cookies on a wire rack and let them sit until the glaze has completely set. This step is crucial as it helps the glaze harden slightly, ensuring it stays on the cookies rather than dripping off.
Conclusion
These Glazed Honey Bun Breakfast Cookies are the perfect combination of convenience and indulgence. With a soft, chewy base, a hint of cinnamon, and a sweet honey glaze, they’ll quickly become a favorite in your breakfast rotation. Whether you’re grabbing one on your way out the door or enjoying them as part of a relaxing morning, they’re sure to bring a smile to your face. And with simple ingredients and easy steps, you can make these sweet treats in no time. Enjoy baking, and most importantly, enjoy eating these delicious cookies!