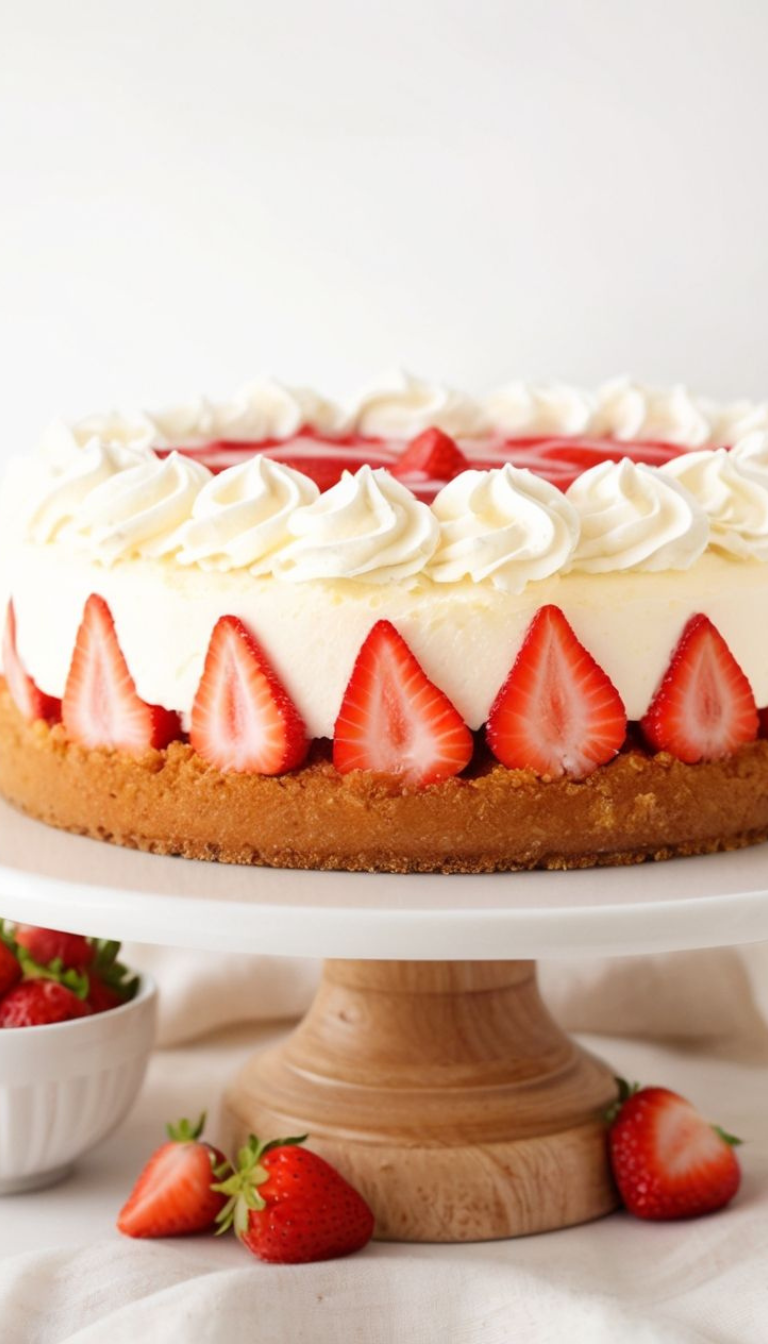
Craving a no-bake dessert that’s light, creamy, and bursting with fresh strawberry flavor? This Strawberry Cream Cheese Icebox Cake is your dream come true.
Made with layers of graham crackers, a luscious cream cheese vanilla pudding filling, sweet strawberry swirls, and a whipped topping,

this chilled dessert is the ultimate treat for spring and summer gatherings—or any time you want a refreshing sweet bite with minimal effort.
Whether you’re entertaining or just treating yourself, this no-bake cake is a perfect make-ahead dessert that delivers big flavor with simple ingredients. Plus, no oven required!
Ingredients List
For the Creamy Filling and Layers
- 4 ounces (half a block) cream cheese, softened at room temperature
- 1 (3.4 ounce) box instant vanilla pudding mix (just the dry mix)
- 1 ½ cups milk, divided
- 3 tablespoons strawberry jam
- 1 (8 ounce) container Cool Whip, thawed and divided
- 12 full sheets graham crackers (or more as needed)
- 1 lb. fresh strawberries, sliced about ¼-inch thick
Optional Garnish
- Additional sliced fresh strawberries for topping

Required Kitchen Tools
To make this no-bake strawberry icebox cake as effortlessly as possible, here are the tools you’ll need:
- Electric Hand Mixer or Stand Mixer – Helps beat the cream cheese into a fluffy, smooth consistency.
- Mixing Bowls – One large bowl for the filling, and a few smaller ones for organizing ingredients.
- 8-inch or 9-inch Square Baking Dish – Preferably deep, with at least 2 ½ to 3 inches in height to accommodate all those delicious layers.
- Offset Spatula or Silicone Spatula – Ideal for spreading layers evenly.
- Sharp Knife – For slicing strawberries cleanly.
- Measuring Cups and Spoons – For accurate portioning of milk, jam, and more.
- Plastic Wrap or Lid – To cover the cake while it chills.
Having the right tools at your side makes the layering process quick, neat, and enjoyable. Get these ready before you start assembling this dreamy dessert.
Creamy Filling Preparation
Creating the silky smooth, strawberry-swirled filling is the heart of this delicious no-bake cake. Here’s how to get that rich, creamy texture with just the right amount of berry sweetness.
Step-by-Step Instructions
- Beat the Cream Cheese
In a large mixing bowl, beat 4 ounces of softened cream cheese using an electric hand mixer or stand mixer. Beat until it’s light, fluffy, and smooth—about 1 ½ to 2 minutes. - Add Pudding Mix and Milk
Pour the dry vanilla pudding mix into the bowl with the cream cheese, along with ¼ cup of the milk. Mix until well combined. The mixture will be thick at this stage—don’t worry, that’s exactly what you want. - Incorporate Remaining Milk
Slowly add in the remaining 1 ¼ cups of milk, mixing as you go. Continue beating until everything is fully incorporated. A few small lumps are perfectly fine! - Swirl in Strawberry Jam
Drop in 3 tablespoons of strawberry jam by the spoonful, then use a knife to gently swirl it into the pudding mixture. Don’t overmix—you want visible strawberry streaks running through the filling for flavor and visual appeal. - Fold in Cool Whip
Gently fold in half of the thawed Cool Whip using a spatula. Take your time with this step to preserve that light, airy texture. The result is a fluffy, creamy filling with beautiful ribbons of strawberry jam.
Assembling the Icebox Cake

This part is where the magic happens. We’re building delicious layers that will soften and meld together as the cake chills.
Layering Steps
- Prep the Dish
Spread a very thin layer (about ¼ cup) of the pudding mixture across the bottom of your deep 8-inch or 9-inch square dish. This helps the graham crackers stick and keeps them in place. - Layer the Graham Crackers
Place a layer of graham crackers over the pudding mixture, breaking pieces as needed to form a complete layer that covers the bottom. - Add Filling and Berries
Spread ⅓ of the remaining pudding mixture evenly over the graham crackers. Top with ⅓ of the sliced strawberries. - Repeat the Layers
Continue layering in this order: graham crackers, pudding mixture, strawberries—two more times, using up all the filling and fresh berries. - Top with Cool Whip
Finally, spread the remaining half of the Cool Whip over the top of the cake, smoothing it into an even layer.
At this point, your cake is beautifully layered and ready to chill so all those flavors can come together.
hilling, Serving, and Garnishing
Once your Strawberry Cream Cheese Icebox Cake is layered to perfection, it’s time to let the fridge do the rest of the work.
Let It Chill

Cover the dish tightly with plastic wrap or a fitted lid and refrigerate for at least 4 hours, but ideally overnight. This step is essential! The graham crackers will soak up moisture from the pudding and cream, transforming into a soft, cake-like texture without ever needing to bake.
Pro Tip: If you’re making this for a special occasion, prepare it the night before so it’s perfectly set and ready to serve the next day.
Garnishing Before Serving
Right before serving, elevate your presentation with a few fresh finishing touches:
- Sliced Fresh Strawberries: Fan out some bright, juicy strawberry slices across the top of the Cool Whip layer.
- Mint Leaves (optional): For a pop of green and an elegant touch.
- Crushed Graham Cracker Crumbs: Lightly sprinkle some over the top for added texture and visual contrast.
These garnishes don’t just make your icebox cake Instagram-worthy—they also add an extra burst of freshness and crunch with every bite.
Slicing and Serving
Use a sharp knife and a pie server or spatula to lift each slice cleanly out of the dish. The layers will hold together beautifully if the cake has had enough chilling time.
This cake is perfect for:
- Summer cookouts
- Mother’s Day brunch
- Potlucks
- Birthdays
- Or anytime you’re craving a cool, fruity treat without turning on the oven
Serve chilled and enjoy the creamy, berry-filled goodness in every bite.
Storage Instructions

Keeping It Fresh
Once assembled, this icebox cake can be stored covered in the refrigerator for up to 3 days. The graham crackers will continue to soften slightly, but the flavors stay bright and delicious. It’s best enjoyed within the first two days for peak texture and freshness.
Can You Freeze It?
Yes, you can! To freeze, wrap the cake tightly in plastic wrap and a layer of foil, or store it in an airtight freezer-safe container. It will keep well for up to 1 month. Thaw overnight in the fridge before serving. Keep in mind that while the texture will be slightly softer, the flavor still shines through.
Extra Notes & Pro Tips
- Use Instant Pudding Only: Make sure to grab the instant vanilla pudding mix—not the cook-and-serve version. It’s crucial for getting that quick, firm set.
- Thaw Cool Whip Properly: Always thaw Cool Whip in the fridge—not at room temperature—to maintain its fluffy texture.
- Avoid Frozen Strawberries: Fresh strawberries are key. Frozen berries will release too much liquid and make the dessert runny.
- Deep Dish Needed: Use a baking dish with at least 2 ½ to 3-inch-high sides. This dessert stacks up tall!

Strawberry Cream Cheese Icebox Cake
Equipment
- Electric hand mixer or stand mixer
- Mixing Bowls
- 8-inch or 9-inch Square Baking Dish
- Offset Spatula or Silicone Spatula
- Sharp Knife
- Measuring Cups and Spoons
- Plastic Wrap or Lid
Ingredients
For the Creamy Filling and Layers
- 4 ounces (half a block) cream cheese, softened at room temperature
- 1 (3.4 ounce) box instant vanilla pudding mix (just the dry mix)
- 1 ½ cups milk, divided
- 3 tablespoons strawberry jam
- 1 (8 ounce) container Cool Whip, thawed and divided
- 12 full sheets graham crackers (or more as needed)
- 1 lb. fresh strawberries, sliced about ¼-inch thick
Optional Garnish
- Additional sliced fresh strawberries for topping
Instructions
- In a large mixing bowl, beat 4 ounces of softened cream cheese using an electric hand mixer or stand mixer. Beat until it’s light, fluffy, and smooth—about 1 ½ to 2 minutes.
- Pour the dry vanilla pudding mix into the bowl with the cream cheese, along with ¼ cup of the milk. Mix until well combined. The mixture will be thick at this stage—don’t worry, that’s exactly what you want.
- Slowly add in the remaining 1 ¼ cups of milk, mixing as you go. Continue beating until everything is fully incorporated. A few small lumps are perfectly fine!
- Drop in 3 tablespoons of strawberry jam by the spoonful, then use a knife to gently swirl it into the pudding mixture. Don’t overmix—you want visible strawberry streaks running through the filling for flavor and visual appeal.
- Gently fold in half of the thawed Cool Whip using a spatula. Take your time with this step to preserve that light, airy texture. The result is a fluffy, creamy filling with beautiful ribbons of strawberry jam.
Layering Steps
- Spread a very thin layer (about ¼ cup) of the pudding mixture across the bottom of your deep 8-inch or 9-inch square dish. This helps the graham crackers stick and keeps them in place.
- Place a layer of graham crackers over the pudding mixture, breaking pieces as needed to form a complete layer that covers the bottom.
- Spread ⅓ of the remaining pudding mixture evenly over the graham crackers. Top with ⅓ of the sliced strawberries.
- Continue layering in this order: graham crackers, pudding mixture, strawberries—two more times, using up all the filling and fresh berries.
- Finally, spread the remaining half of the Cool Whip over the top of the cake, smoothing it into an even layer.
Conclusion
This Strawberry Cream Cheese Icebox Cake is a true no-bake wonder. With its creamy layers, juicy strawberries, and dreamy texture, it’s a dessert that looks like you spent hours on it—when in reality, it came together in minutes. Perfect for warm weather, family gatherings, or just because you deserve something sweet.
Whether you’re a beginner baker or a seasoned dessert lover, this recipe delivers on every level: easy, impressive, and incredibly satisfying. I hope it becomes one of your go-to treats just like it has for me.