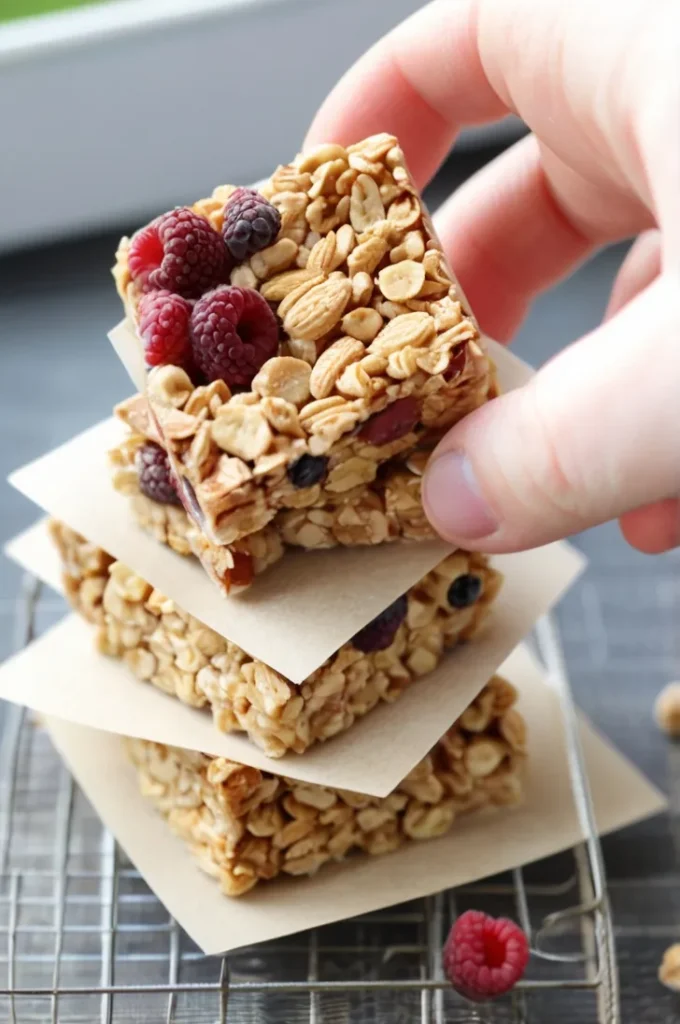
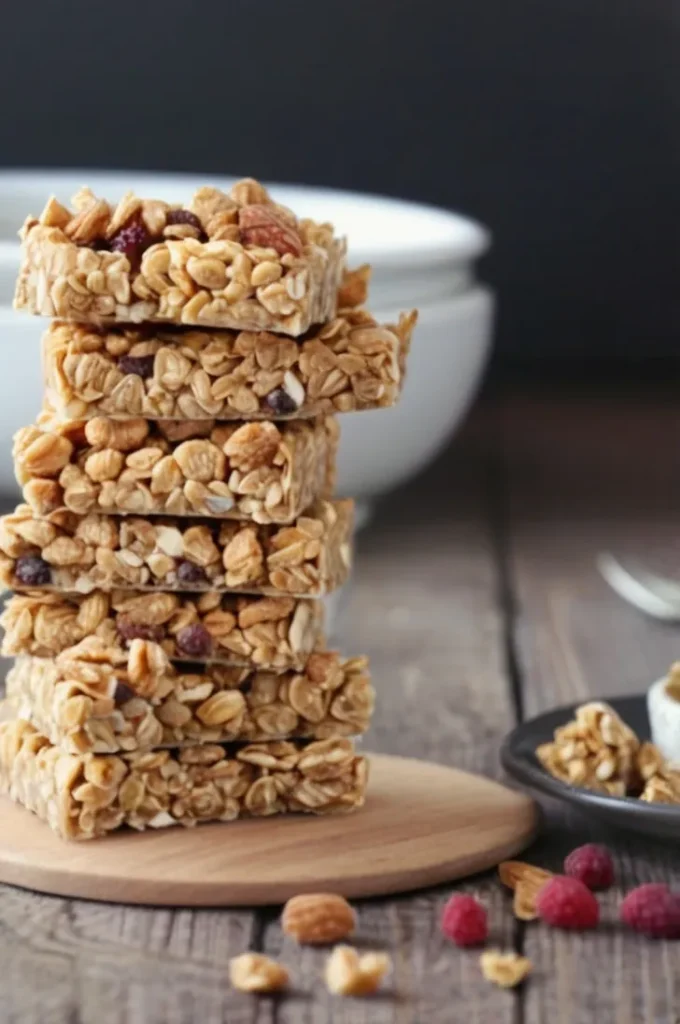
These freezer-friendly breakfast cereal bars are the perfect on-the-go snack to start your day off right.

Packed with fiber, protein, and a touch of sweetness, these bars are not only easy to make but also customizable to suit your taste buds.
Whether you’re in a rush or just want a delicious, healthy snack, these bars will quickly become a favorite in your kitchen.
Ingredients List
Wet Ingredients
- ½ cup honey
- 2 teaspoons vanilla extract
- ½ teaspoon salt
- ¼ teaspoon cinnamon
- ¼ cup creamy almond butter or peanut butter
Dry Ingredients
- 2 cups Quaker Oatmeal Squares cereal, slightly crushed
- 1 cup Rice Krispies cereal
- ¼ cup ground flaxseed
- ¼ cup ground wheat germ
- ½ cup peanuts or almonds, chopped
- ½ cup raisins (or other dried fruit of your choice)
- ¼ cup dark chocolate chips
Required Kitchen Tools
Before diving into the recipe, ensure you have the right tools to make these freezer-friendly breakfast bars come together seamlessly. Here’s what you’ll need:
- 8-inch square baking pan – This will be your base for pressing the mixture into to form bars.
- Parchment paper – To line the baking pan and make sure your bars don’t stick.
- Saucepan – For simmering the wet ingredients.
- Large mixing bowl – To combine the dry ingredients and mix with the wet ingredients.
- Cooking spray – To prevent the mixture from sticking to your hands or the parchment paper.
Having these tools handy will ensure a smooth process and make cleanup a breeze.
Preparation Steps
Creating these breakfast cereal bars is a simple and straightforward process. By following these easy steps, you’ll have delicious, homemade bars ready in no time!
Step 1: Prepare Your Pan
Start by lining the bottom of an 8-inch square baking pan with parchment paper. This will help keep the bars from sticking to the pan and make it easier to remove them once they’ve chilled. Once the parchment paper is in place, lightly spray the pan with cooking spray to ensure everything releases smoothly.

Step 2: Heat the Wet Ingredients
In a small saucepan, combine the honey, vanilla extract, salt, cinnamon, and almond butter (or peanut butter). Place the saucepan over medium heat and bring the mixture to a boil. Once it starts to bubble, reduce the heat to low and let it simmer for 3-4 minutes. Stir the mixture regularly to ensure it doesn’t burn and is evenly combined. This step helps to bring out the flavors and makes the bars more cohesive.
Step 3: Mix the Dry Ingredients
While the wet ingredients are simmering, grab a large mixing bowl and combine the Quaker Oatmeal Squares cereal, Rice Krispies cereal, flaxseed, wheat germ, chopped peanuts or almonds, and raisins (or other dried fruit you’re using). Give everything a quick stir to ensure the dry ingredients are evenly mixed.
Step 4: Combine Wet and Dry Ingredients
Once the wet mixture has simmered for a few minutes, remove it from the heat. Pour the warm honey and almond butter mixture over the dry ingredients in the large mixing bowl. Stir everything together until the ingredients are well combined and coated with the wet mixture. You want to make sure the dry ingredients are fully coated for the best texture in your bars.
Step 5: Add the Chocolate Chips
After the wet and dry ingredients are combined, add the dark chocolate chips. Gently fold them into the mixture, being careful not to overmix, as this could cause the chocolate chips to melt. You still want those little pockets of chocolate in each bar for a delightful surprise in every bite.
Step 6: Press the Mixture into the Pan
Now comes the fun part! Spray your hands with a bit of cooking spray or use a piece of parchment paper to firmly press the mixture into the prepared baking pan. Press down evenly to make sure the mixture is compacted, which will help the bars hold together once they’re cut. The more firmly you press, the sturdier your bars will be.
Step 7: Chill and Set
Once you’ve pressed the mixture into the pan, it’s time to let it chill. Place the pan in the refrigerator and allow the bars to set for at least 1 hour. This step is crucial for firming up the mixture so you can easily cut it into neat bars. The longer you let them chill, the firmer they will become.
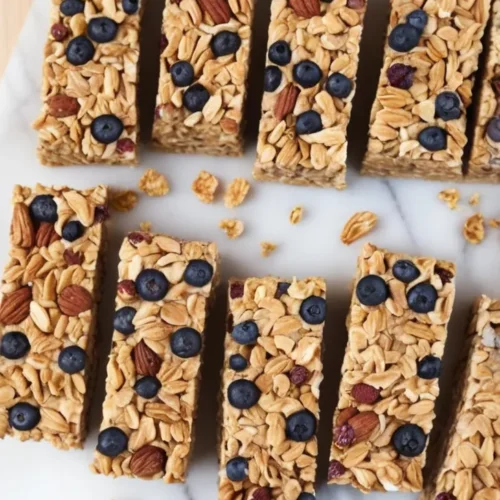
Step 8: Cut Into Bars
After the bars have chilled and set, remove the pan from the refrigerator. Using a sharp knife, cut the mixture into square or rectangular bars, depending on your preference. These bars are perfect for a quick breakfast, a snack, or even a pre-workout boost!
Storing Your Breakfast Cereal Bars
How to Keep Them Fresh
These freezer-friendly breakfast cereal bars are incredibly easy to store. To keep them fresh, simply place them in an airtight container at room temperature. They will stay fresh for up to 3 days. However, for longer shelf life, storing them in the freezer is your best bet.
Freezing the Bars
If you’d like to store these bars for an extended period, place them in a freezer-safe bag or airtight container. For added convenience, you can individually wrap each bar in plastic wrap before freezing. These bars can be stored in the freezer for up to 1 month. When you’re ready to enjoy, just pull one out and let it thaw at room temperature or pop it in the microwave for a few seconds for a quick breakfast.
Freezer-Friendly Breakfast Cereal Bars
Equipment
- 8-inch square baking pan
- Parchment pape
- Saucepan
- Large Mixing Bowl
- Cooking Spray
Ingredients
Wet Ingredients
- ½ cup honey
- 2 teaspoons vanilla extract
- ½ teaspoon salt
- ¼ teaspoon cinnamon
- ¼ cup creamy almond butter or peanut butter
Dry Ingredients
- 2 cups Quaker Oatmeal Squares cereal, slightly crushed
- 1 cup Rice Krispies cereal
- ¼ cup ground flaxseed
- ¼ cup ground wheat germ
- ½ cup peanuts or almonds, chopped
- ½ cup raisins (or other dried fruit of your choice)
- ¼ cup dark chocolate chips
Instructions
- Start by lining the bottom of an 8-inch square baking pan with parchment paper. This will help keep the bars from sticking to the pan and make it easier to remove them once they’ve chilled. Once the parchment paper is in place, lightly spray the pan with cooking spray to ensure everything releases smoothly
- In a small saucepan, combine the honey, vanilla extract, salt, cinnamon, and almond butter (or peanut butter). Place the saucepan over medium heat and bring the mixture to a boil. Once it starts to bubble, reduce the heat to low and let it simmer for 3-4 minutes. Stir the mixture regularly to ensure it doesn’t burn and is evenly combined. This step helps to bring out the flavors and makes the bars more cohesive.
- While the wet ingredients are simmering, grab a large mixing bowl and combine the Quaker Oatmeal Squares cereal, Rice Krispies cereal, flaxseed, wheat germ, chopped peanuts or almonds, and raisins (or other dried fruit you’re using). Give everything a quick stir to ensure the dry ingredients are evenly mixed.
- Once the wet mixture has simmered for a few minutes, remove it from the heat. Pour the warm honey and almond butter mixture over the dry ingredients in the large mixing bowl. Stir everything together until the ingredients are well combined and coated with the wet mixture. You want to make sure the dry ingredients are fully coated for the best texture in your bars
- After the wet and dry ingredients are combined, add the dark chocolate chips. Gently fold them into the mixture, being careful not to overmix, as this could cause the chocolate chips to melt. You still want those little pockets of chocolate in each bar for a delightful surprise in every bite.
- Now comes the fun part! Spray your hands with a bit of cooking spray or use a piece of parchment paper to firmly press the mixture into the prepared baking pan. Press down evenly to make sure the mixture is compacted, which will help the bars hold together once they’re cut. The more firmly you press, the sturdier your bars will be.
- Once you’ve pressed the mixture into the pan, it’s time to let it chill. Place the pan in the refrigerator and allow the bars to set for at least 1 hour. This step is crucial for firming up the mixture so you can easily cut it into neat bars. The longer you let them chill, the firmer they will become.
- After the bars have chilled and set, remove the pan from the refrigerator. Using a sharp knife, cut the mixture into square or rectangular bars, depending on your preference. These bars are perfect for a quick breakfast, a snack, or even a pre-workout boost!
Conclusion
These freezer-friendly breakfast cereal bars are not only delicious but also incredibly versatile and customizable. With wholesome ingredients like oats, flaxseed, nuts, and dried fruit, they provide a satisfying balance of protein and fiber. Whether you’re preparing them for the week ahead or making a batch for the whole family, these bars are sure to become a go-to breakfast or snack. With easy storage and endless customization options, you’ll love having these homemade bars ready whenever you need them!